Custom Map Guides (WIP)


-
A little something I wrote for my crew and wanted to share. I felt this didn't quite belong in the mapping sub-forum (let me know if this should be moved). This is a first draft, suggestions are very much appreciated. -The black airbrush on a few pictures was needed last-minute, that will be cleaned up in the future
Zerg Canyon
Overview
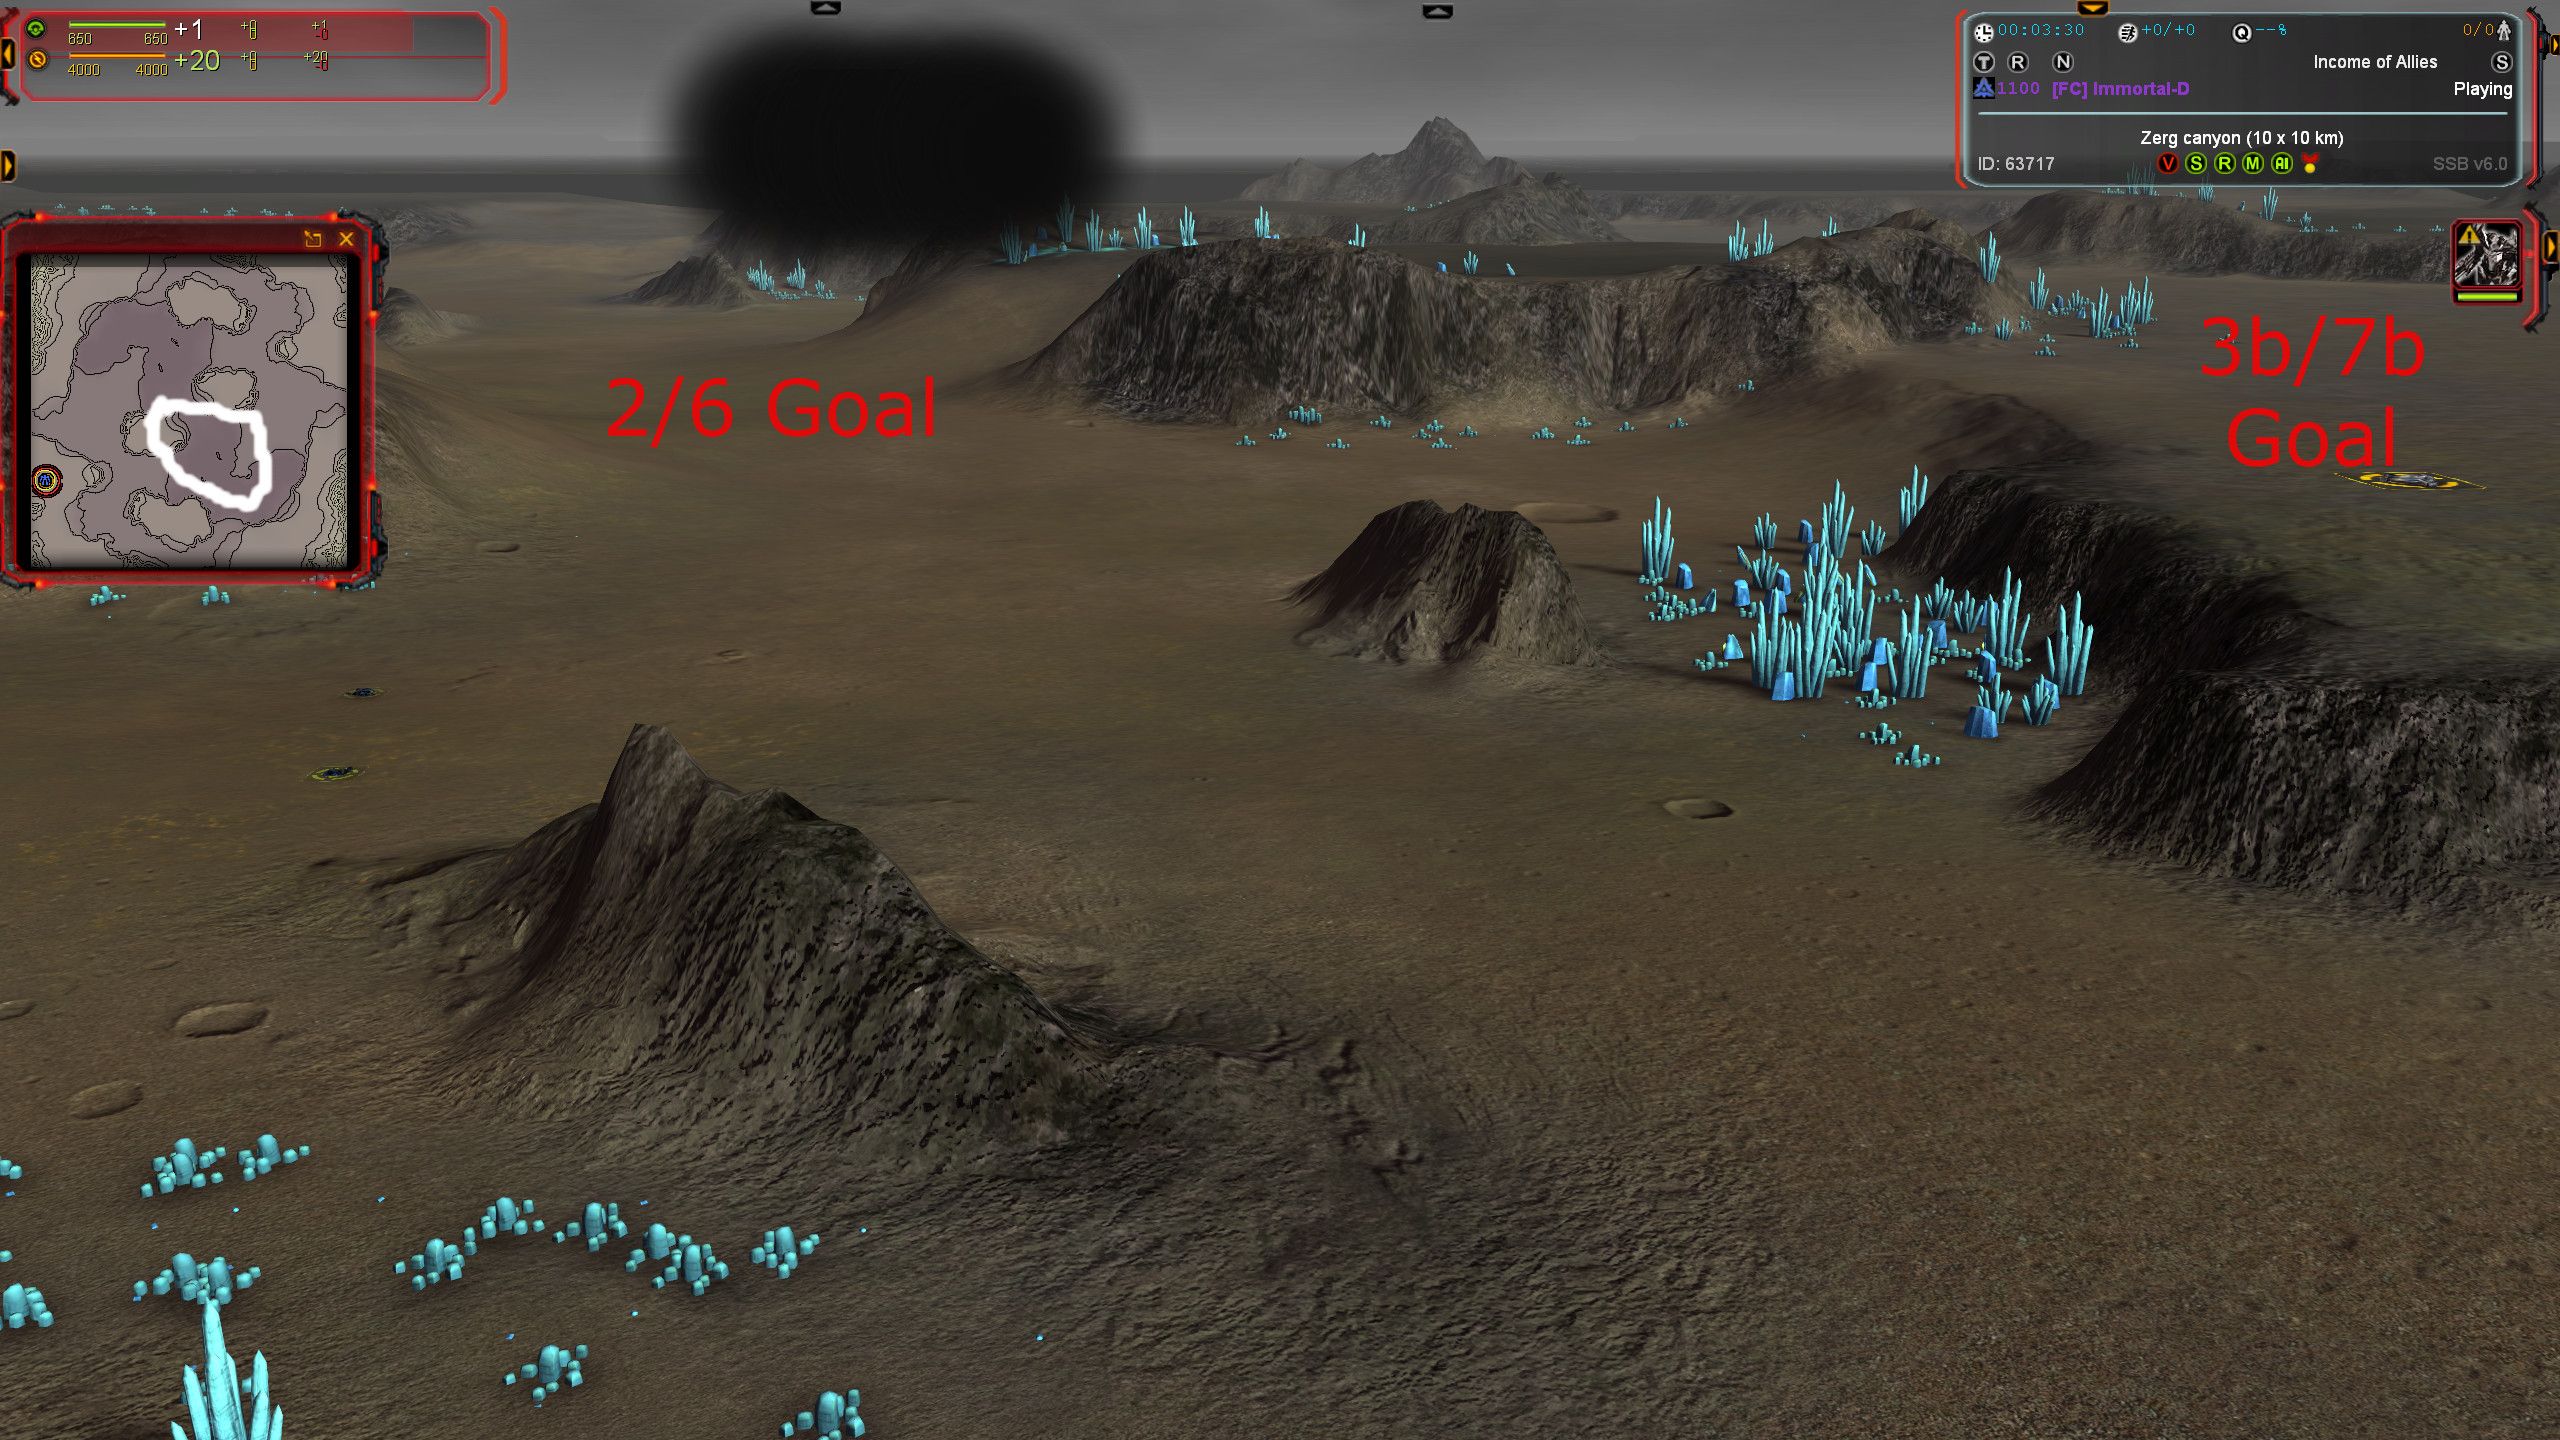
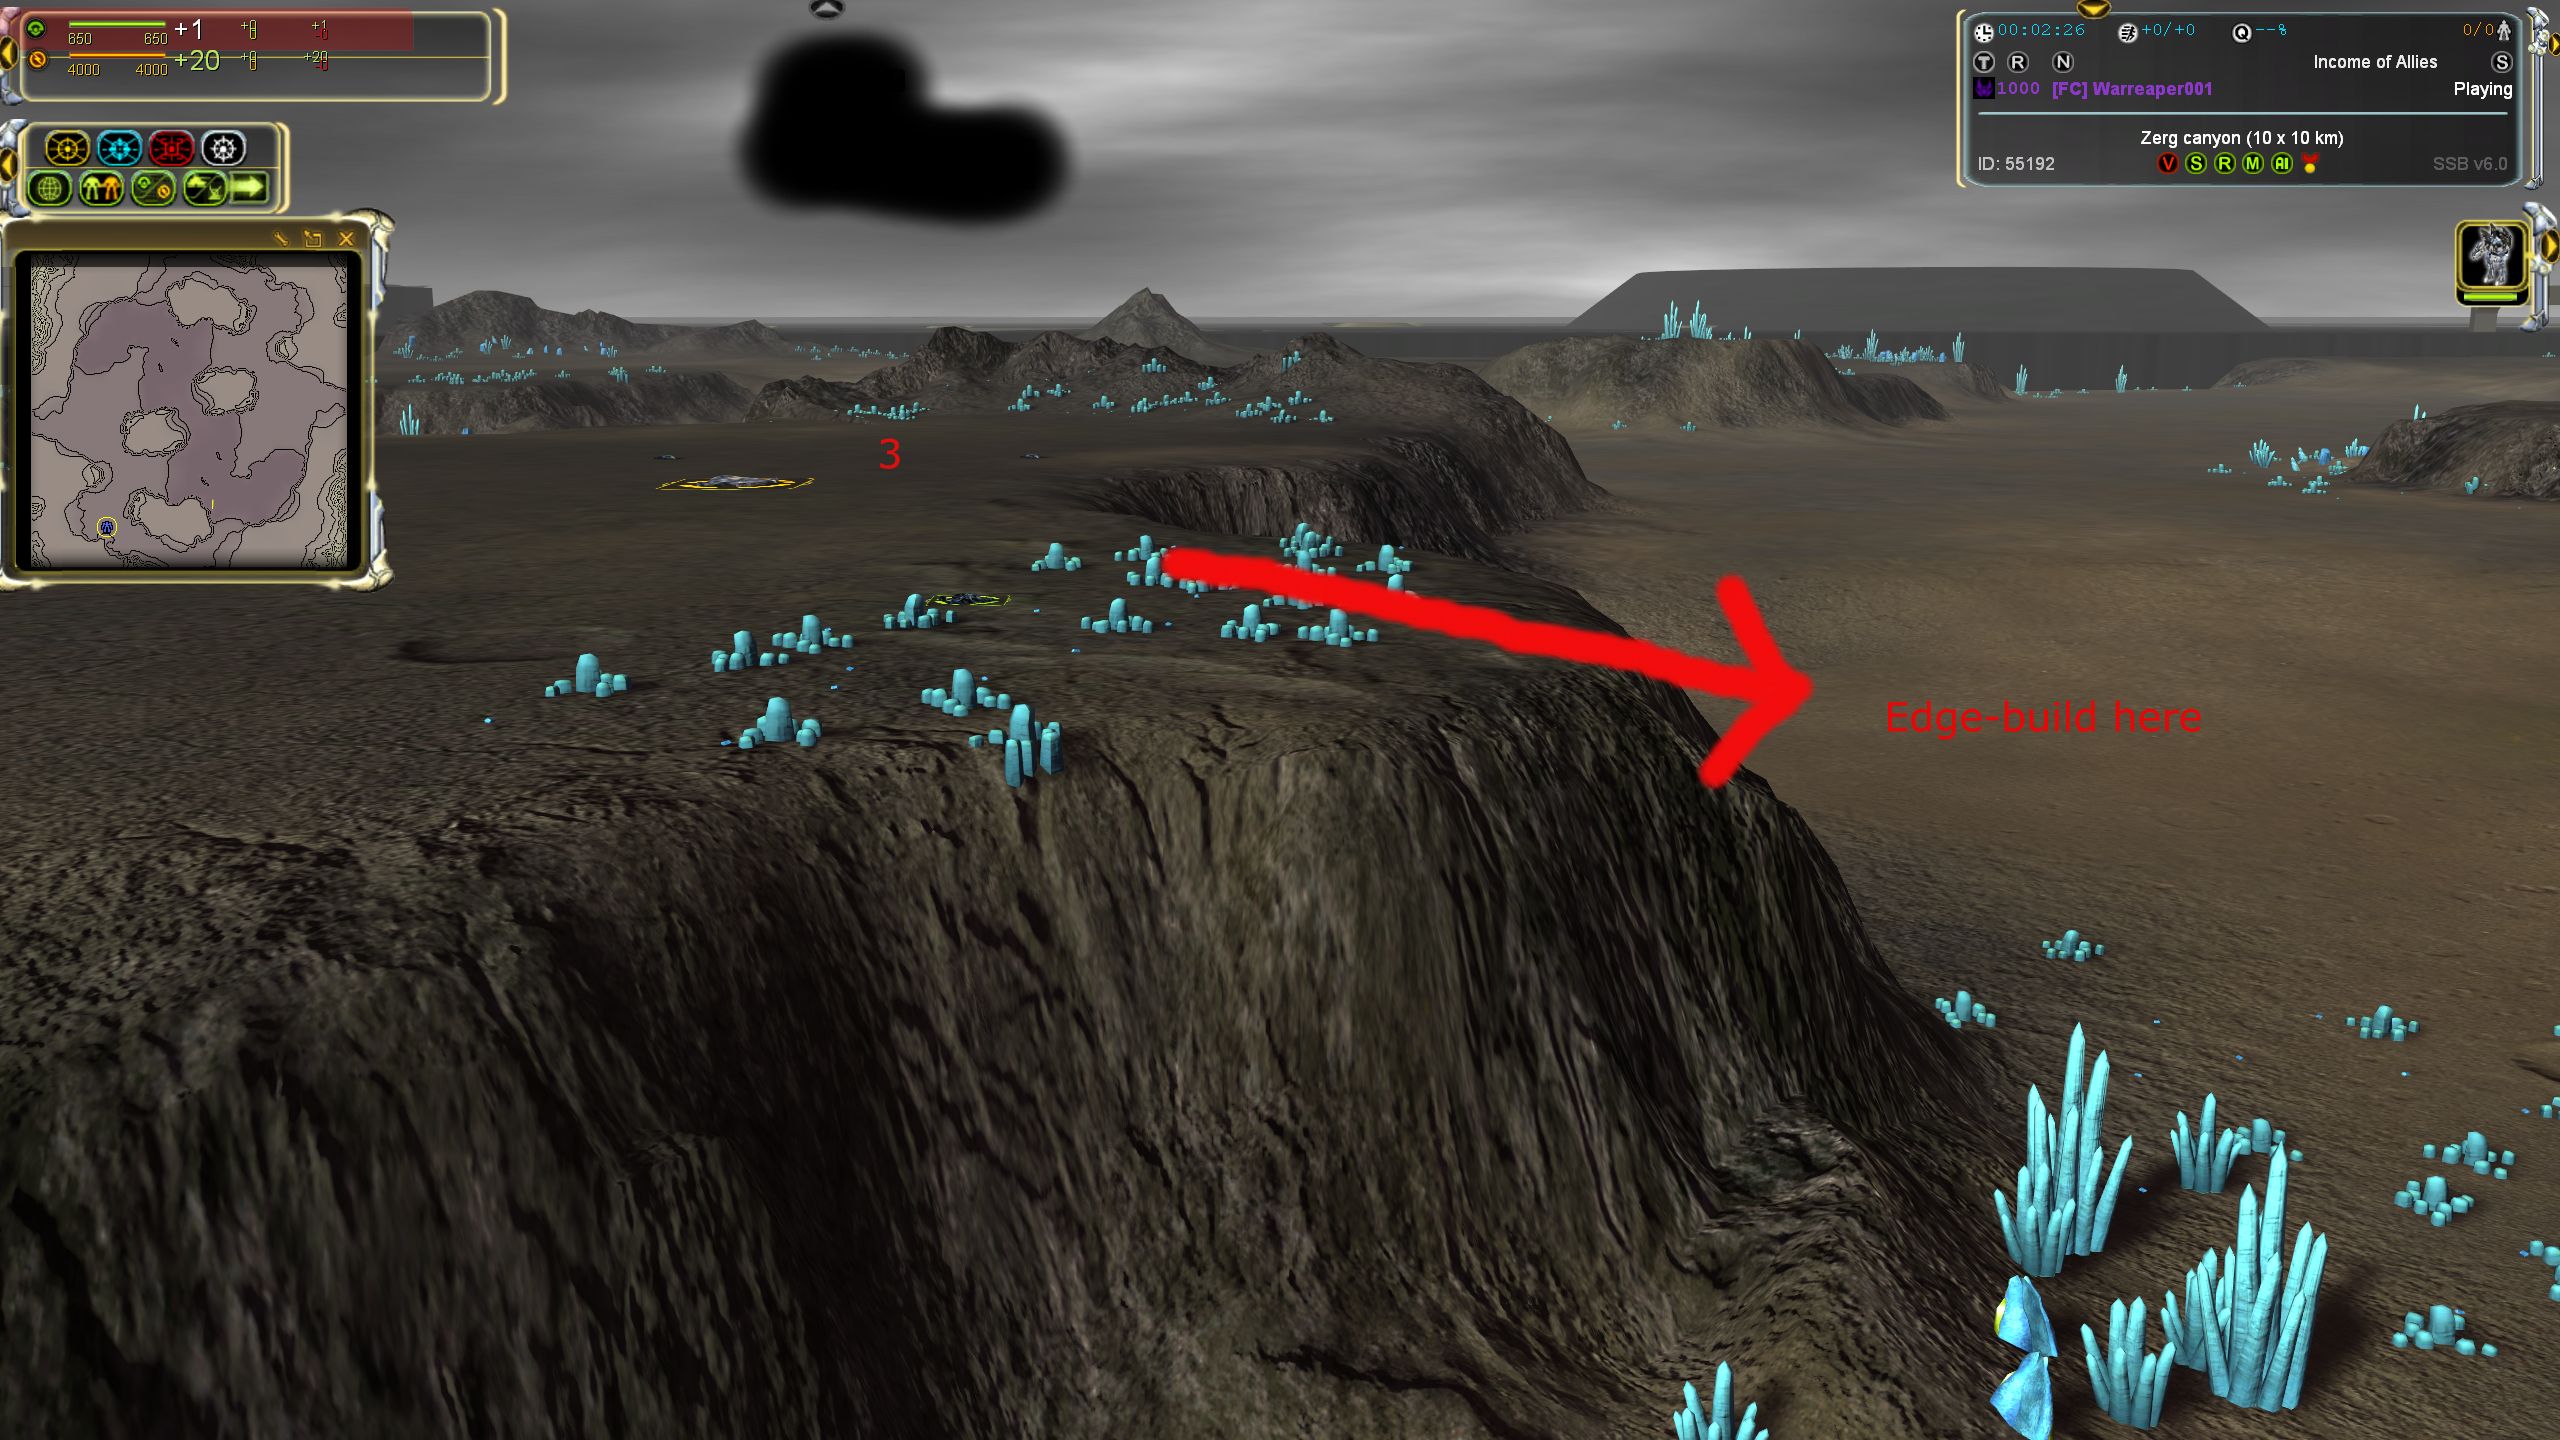
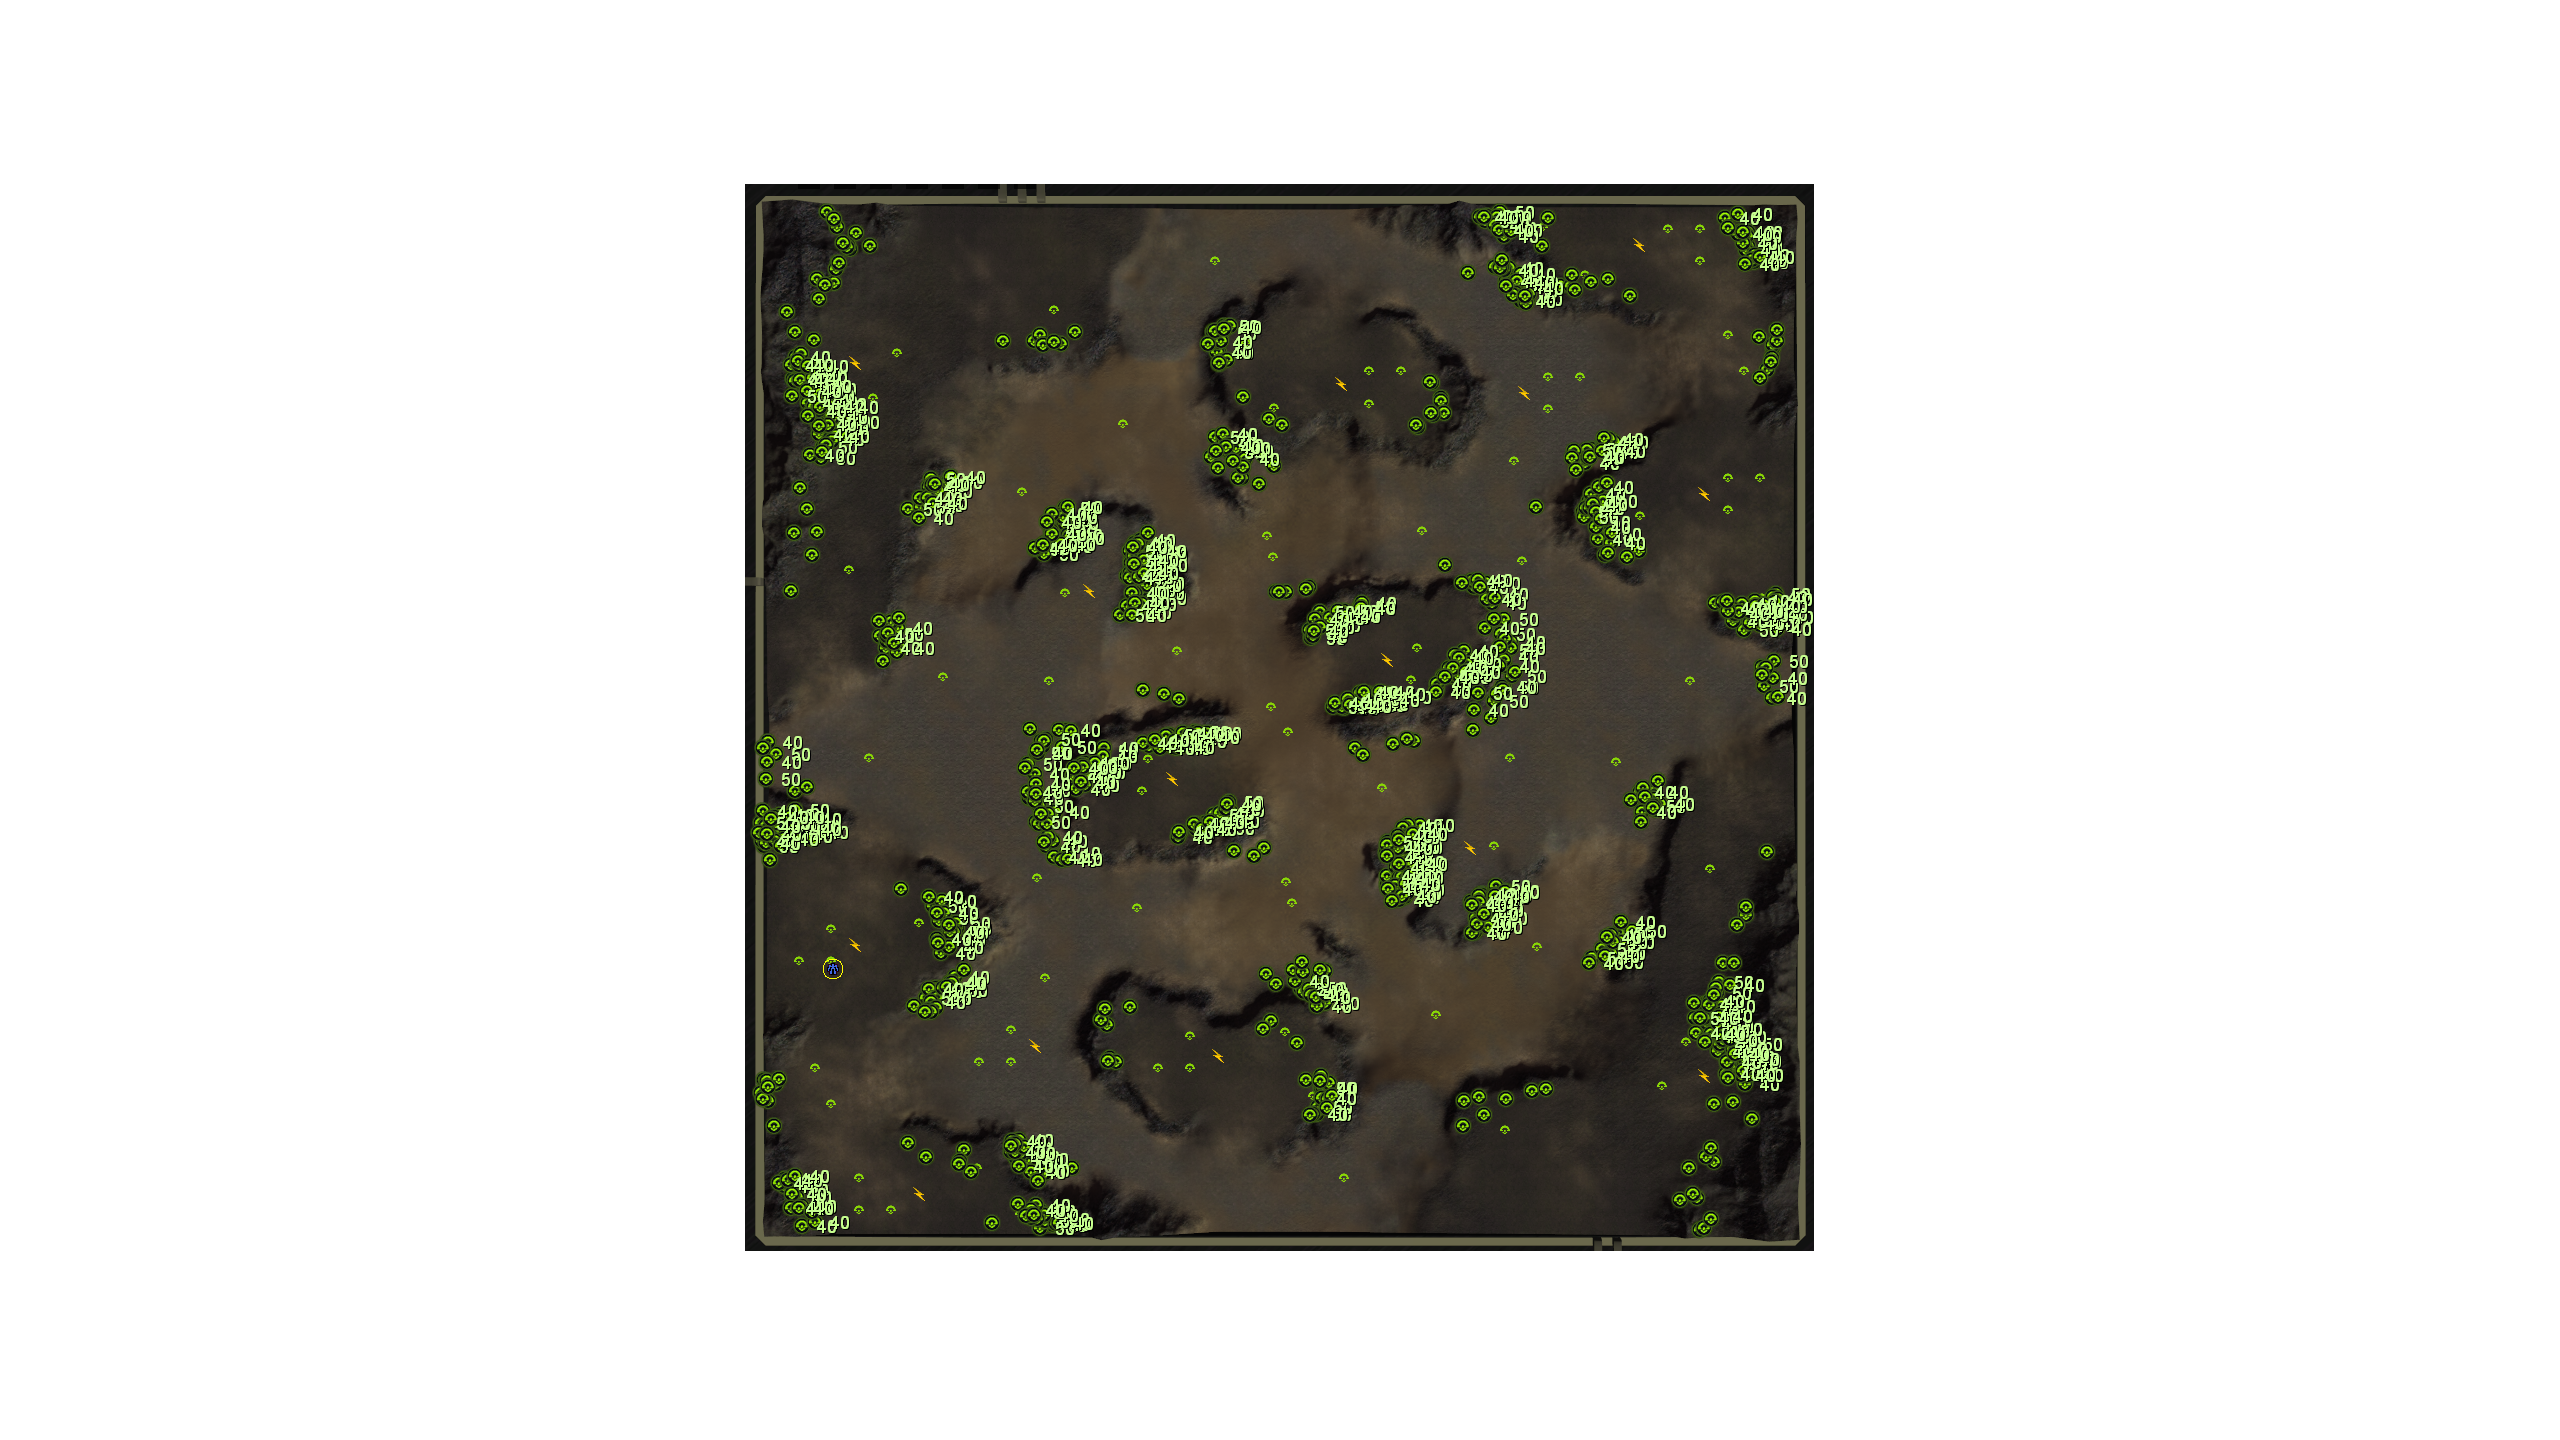
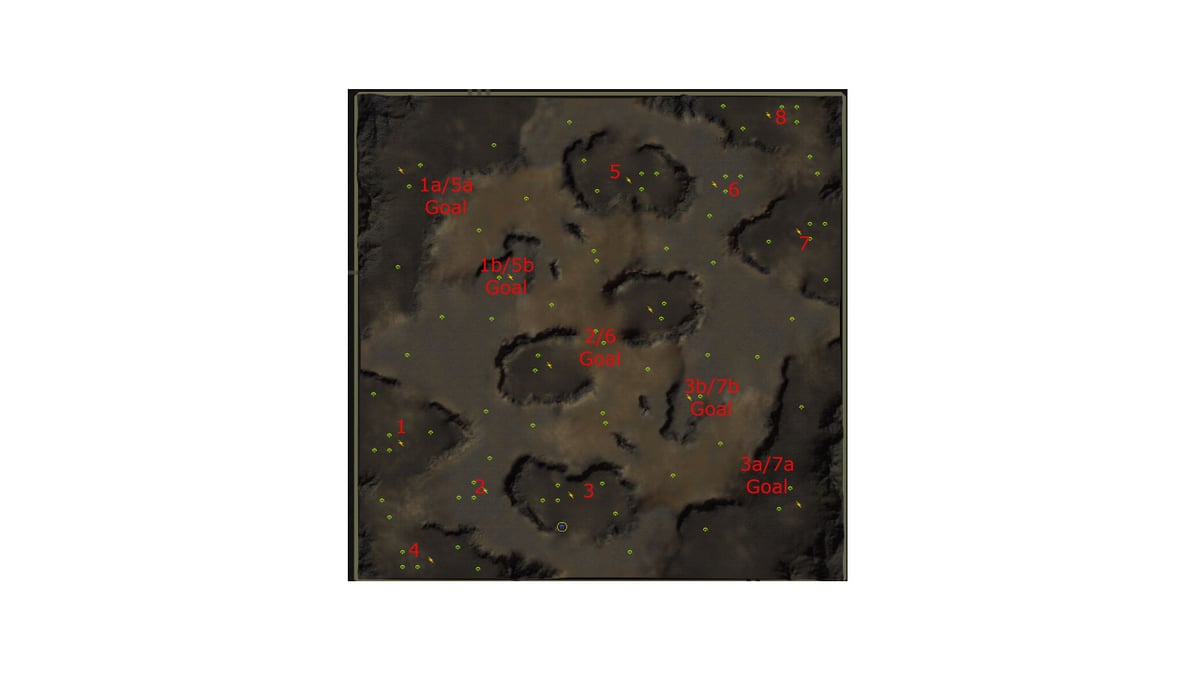
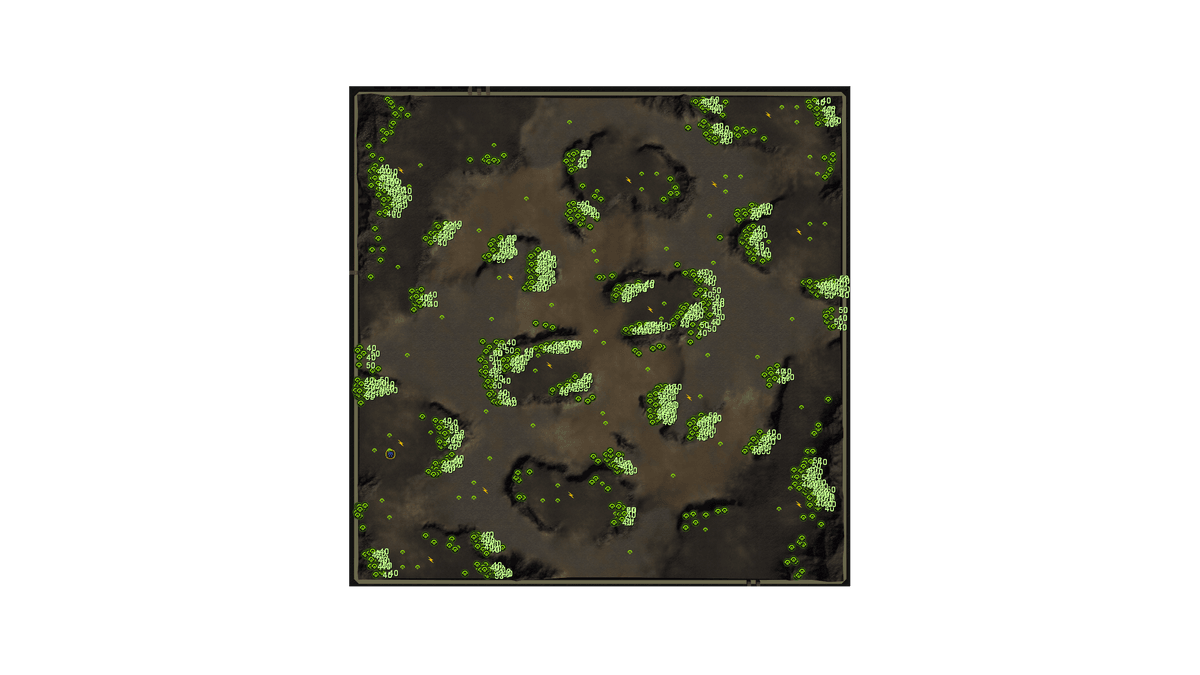
Another simple map, but the dark mud means that connected pathways may not be obvious at a glance. Reclaim is evenly distributed across the edges of all the mountains, so you can use this to gauge paths during the early game. Edge-building is critical at positions 2/6 & 3/5; securing the middle and leaving your core base, respectively.

This map is a good example of why you need to be aware of terrain. Although the color changes with elevation, in the heat of battle it's all mud. Taking the time to carefully build your defenses at the top of ramps and edge of mountains can be a game-changer. In a battle between Point Defense & Elevation, the ground always wins.

Game Plan
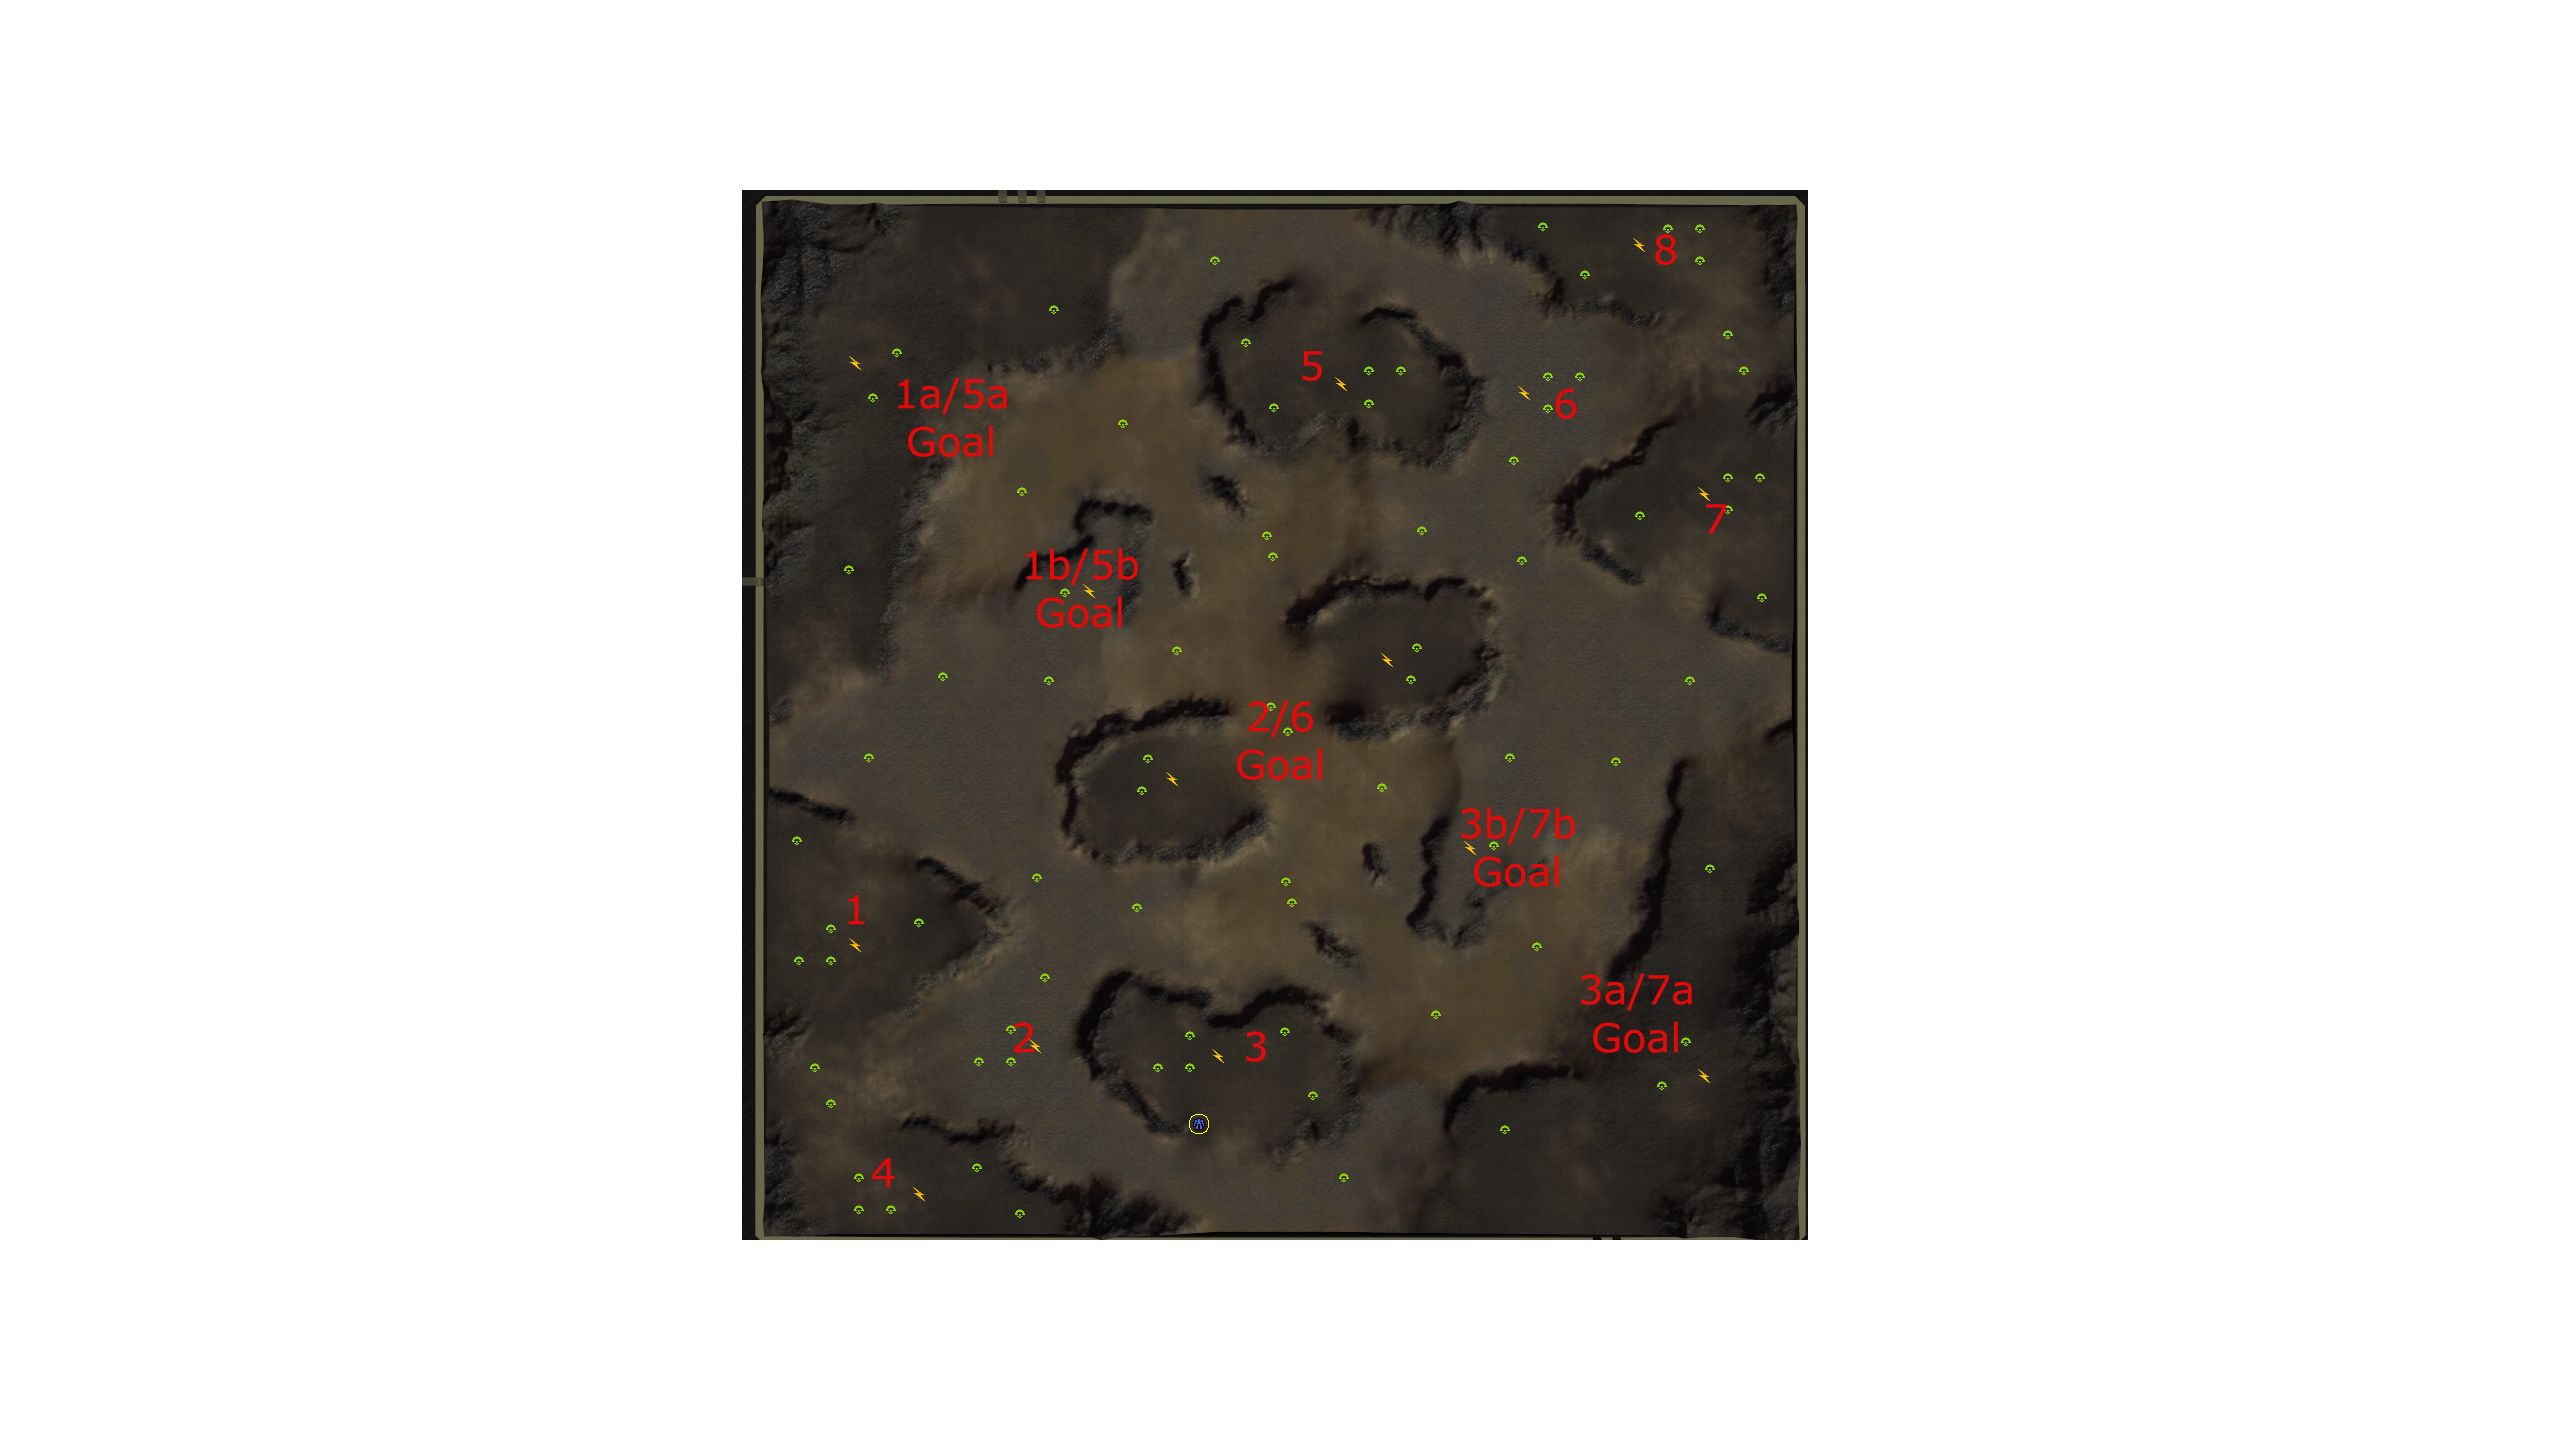
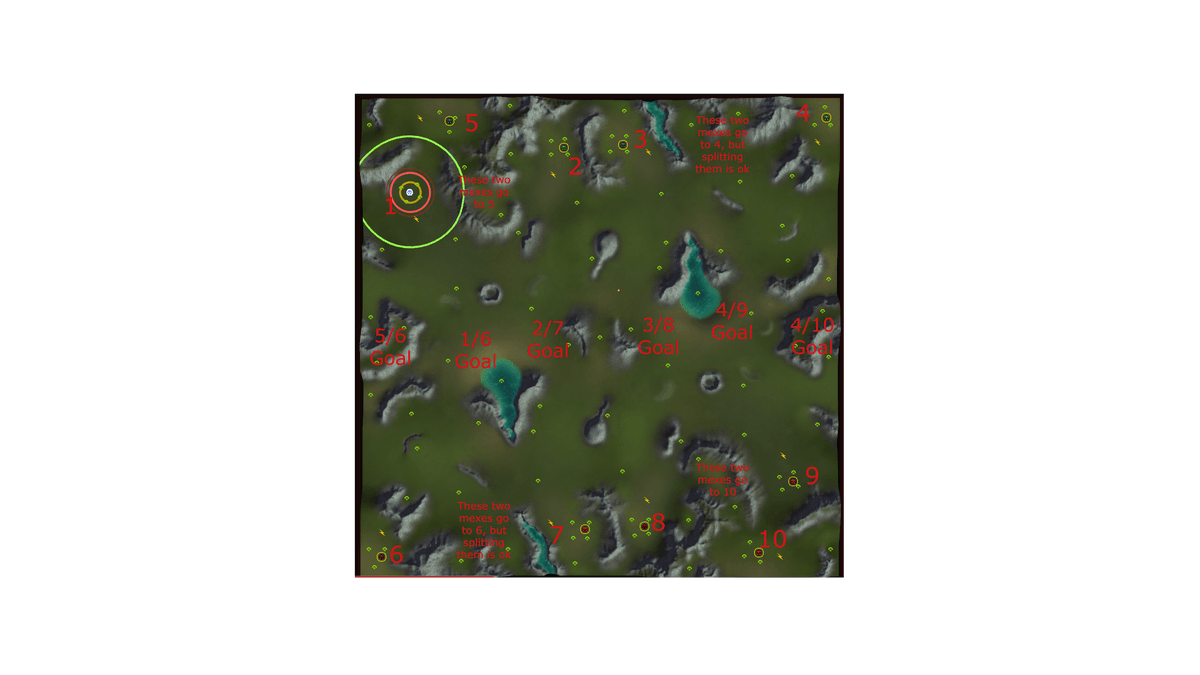
Getting your Commander out of the base early is always a good idea, but that is doubly important here. The side players have two Goals, while the middle player can be attacked 3v1 from the very start. Position 4 should move the Commander up to support middle within the first couple minutes. Remember, a vanilla ACU is worth just two T1 engies, but can fight ~20 tanks.
Use your Commander at the secondary goals (“B”) and your army at the primary (“A”). That way if the battle turns against you, your Com won't be caught out at the edge of the world. You can still consolidate forces with your teammates and counter-attack from the middle. Additionally, Goal B has the height advantage, so your Com can harass the enemy army from relative safety. Be careful at sub-goal B that you don't get stuck into a corner! (literally)
On most 10 kilometer maps, forcing no-mans-land to be on your opponent's side of the middle means that Tac. Missiles against his core are a good option. T1 Air Scouts are dirt cheap. You should build them (somebody meme this please). That said, a forward radar hugging the mountain is always a good idea as well.
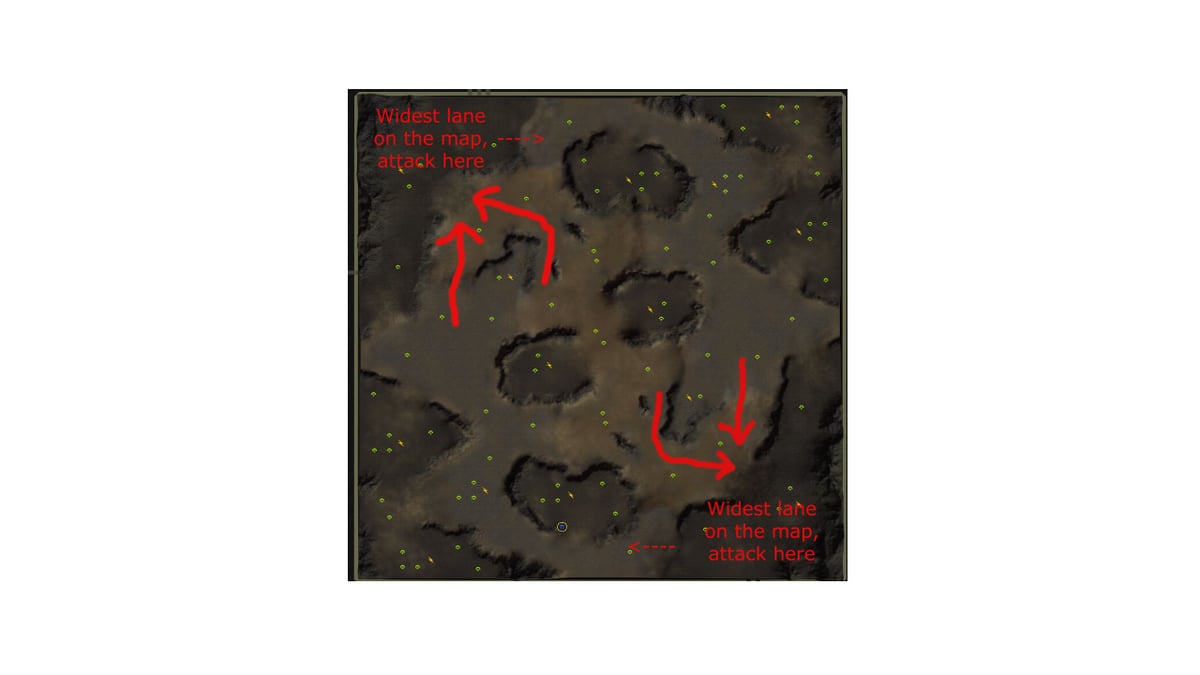
Lastly, terrain is again a factor when attacking the enemy's core base. All 4 positions have a narrow chokepoint to defend. Your best bet is to attack from the “1a/7a Goal” position, going around the back of the enemy's Player 3/5. Anything else is a frontal assault against elevation and mountains, which will require a significant army to break through. In most situations, hitting the back lines in this fashion is always a GG.
Wegos
Overview
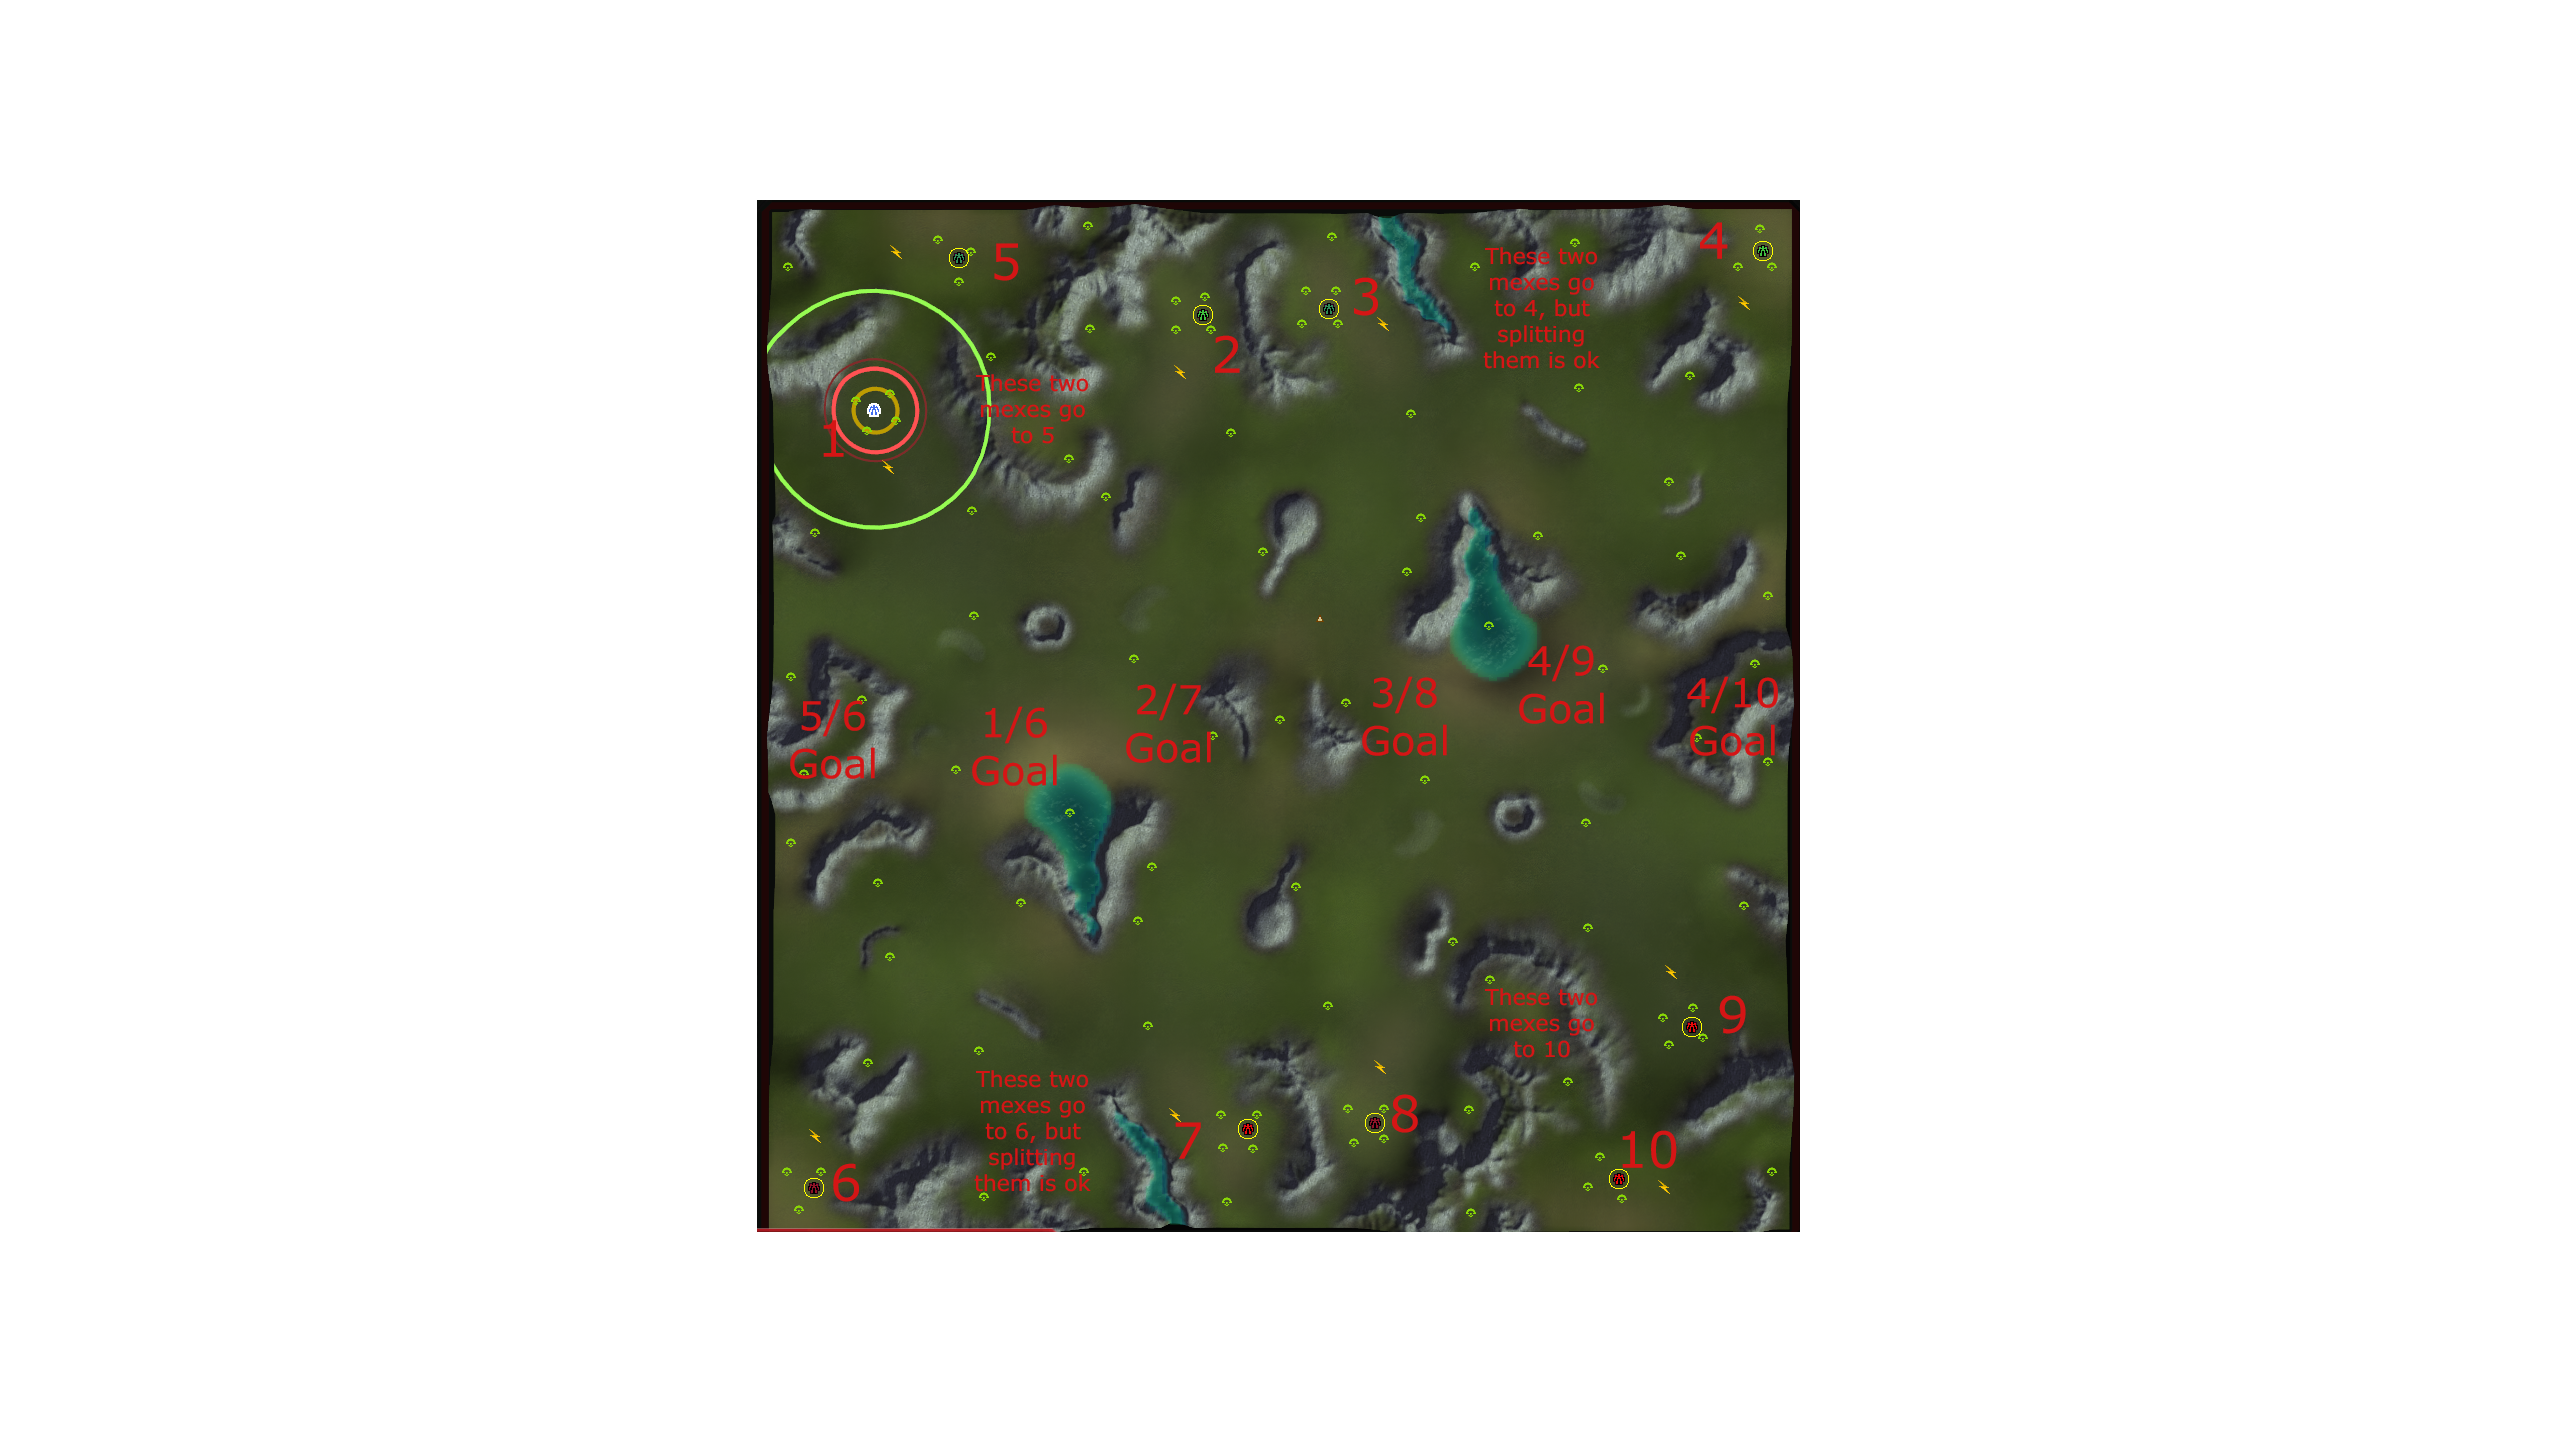
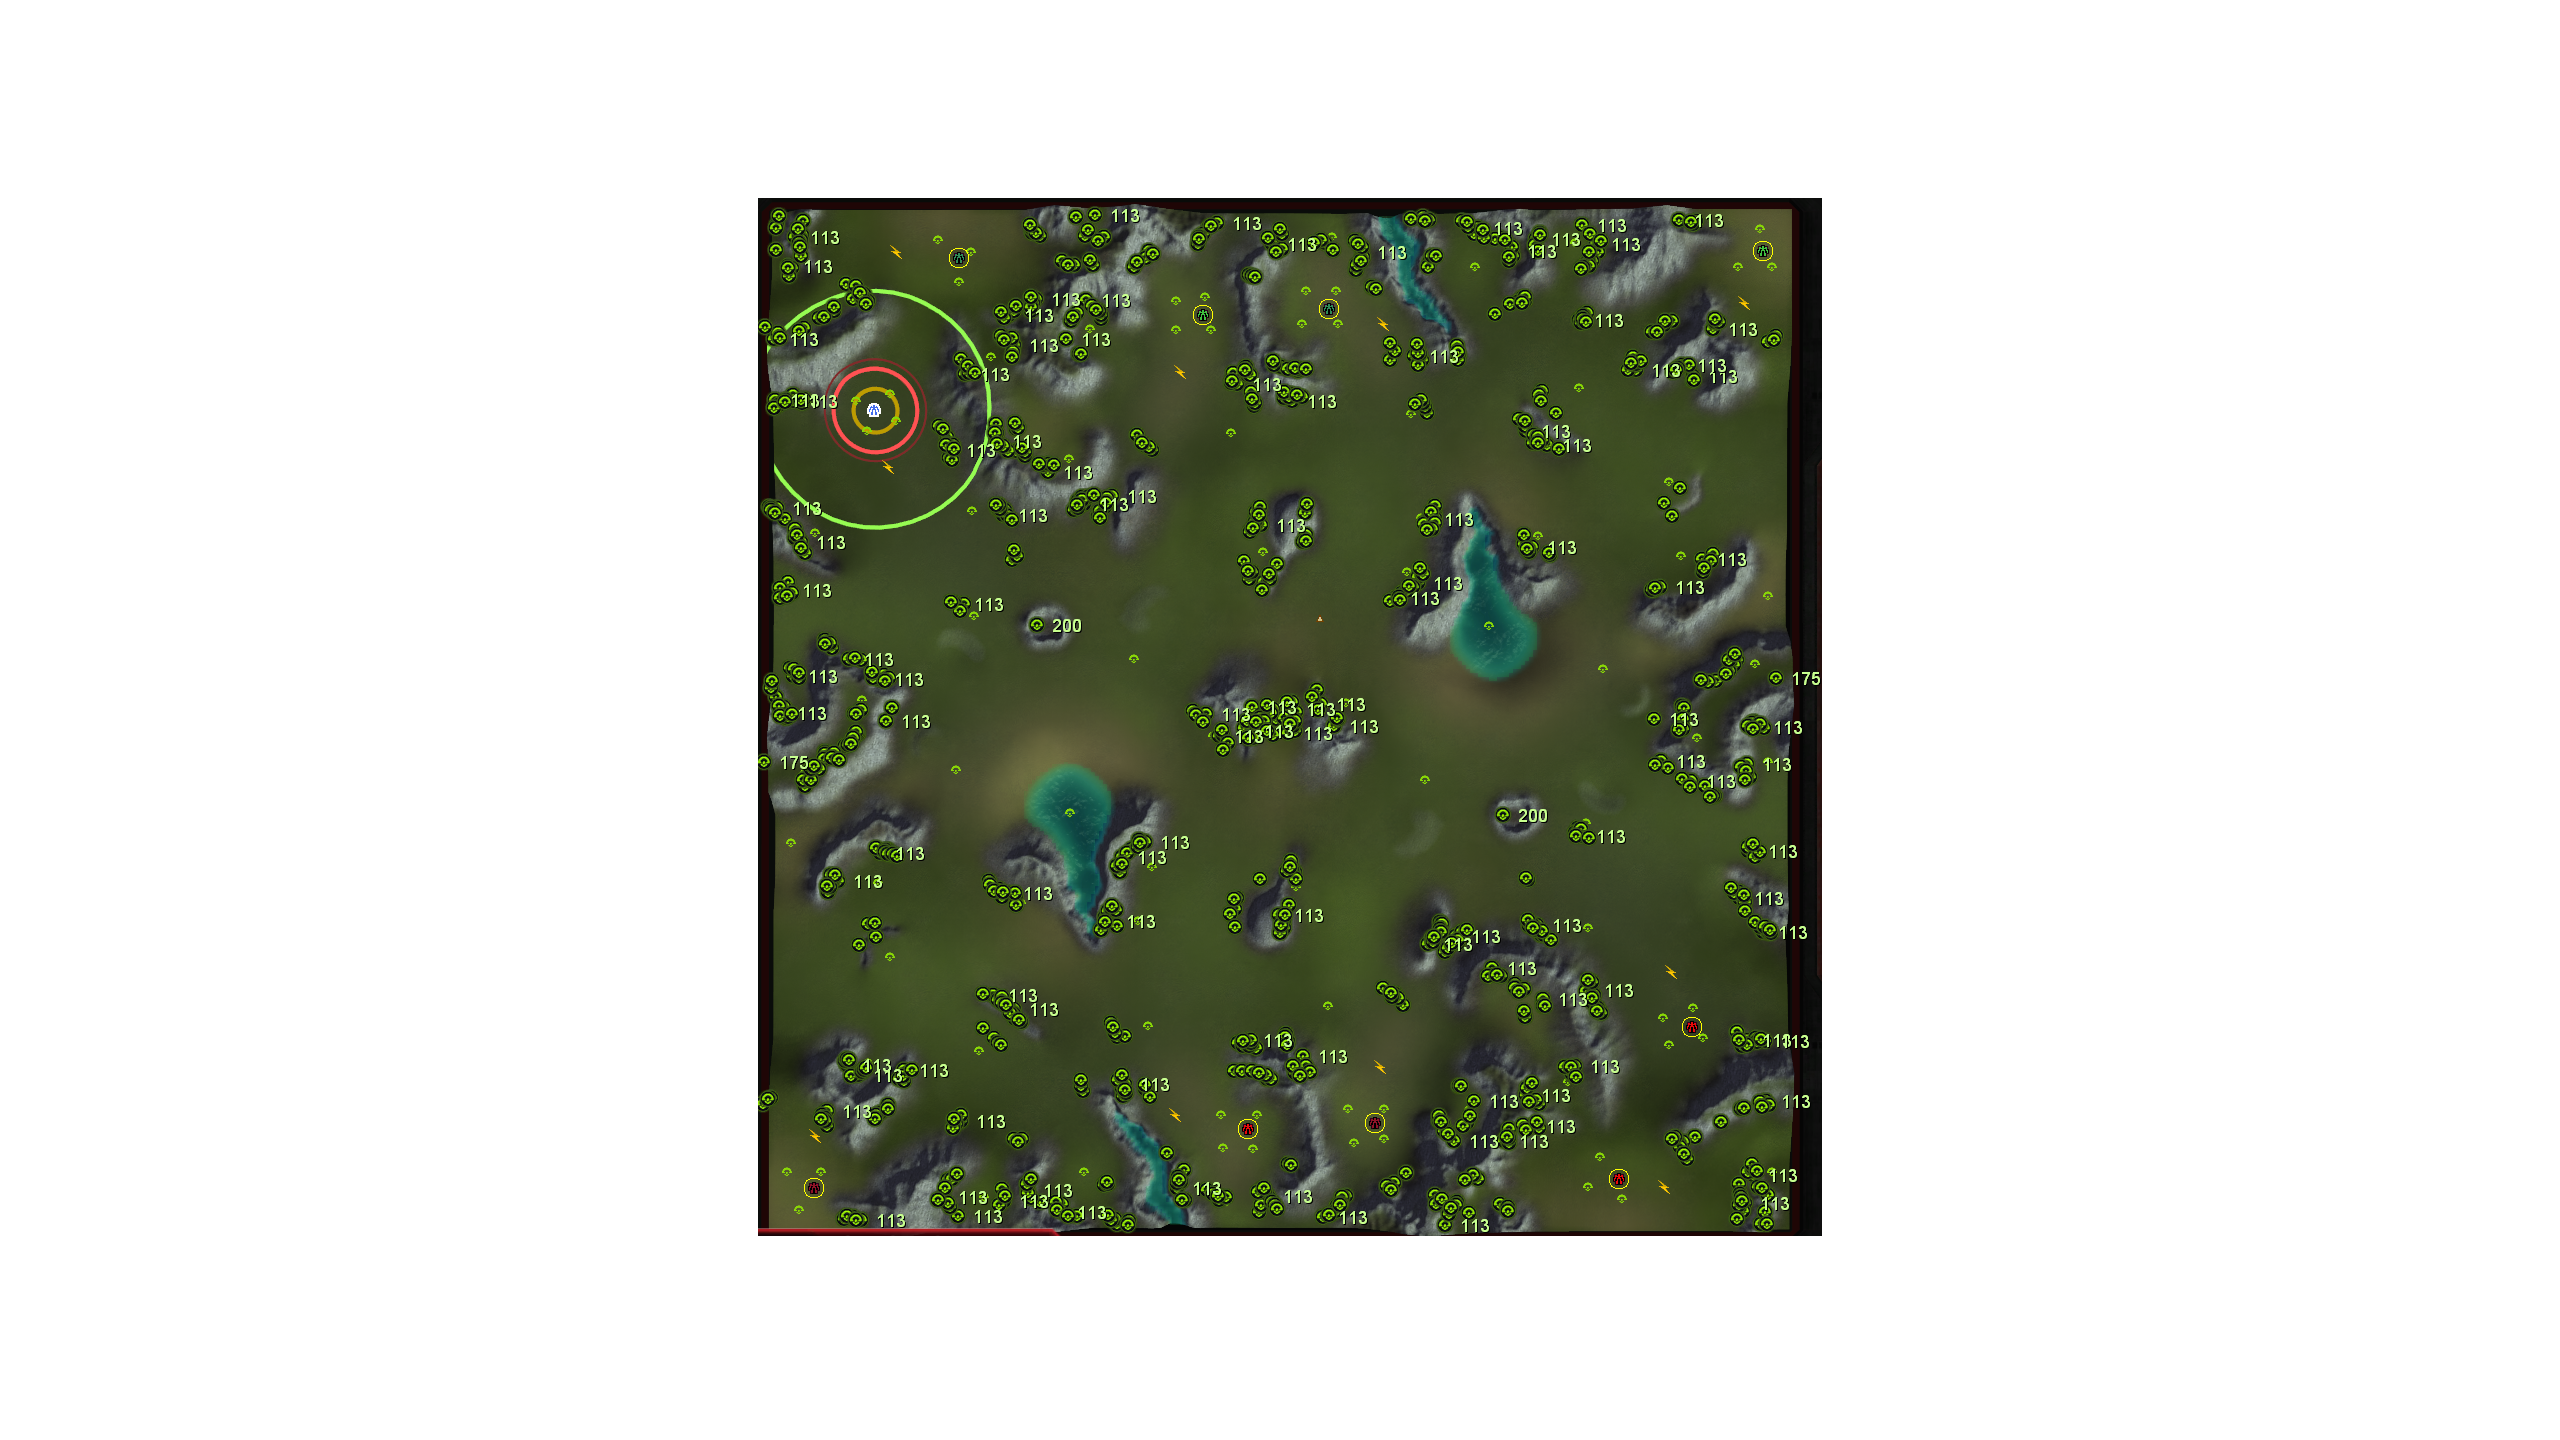
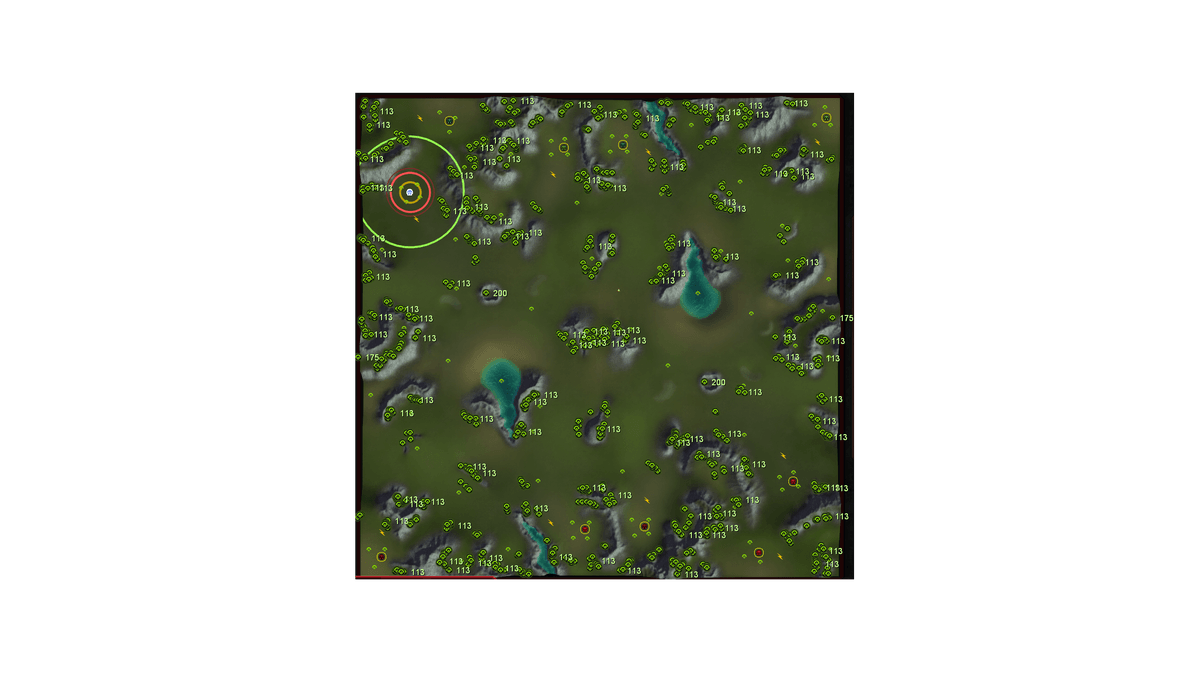
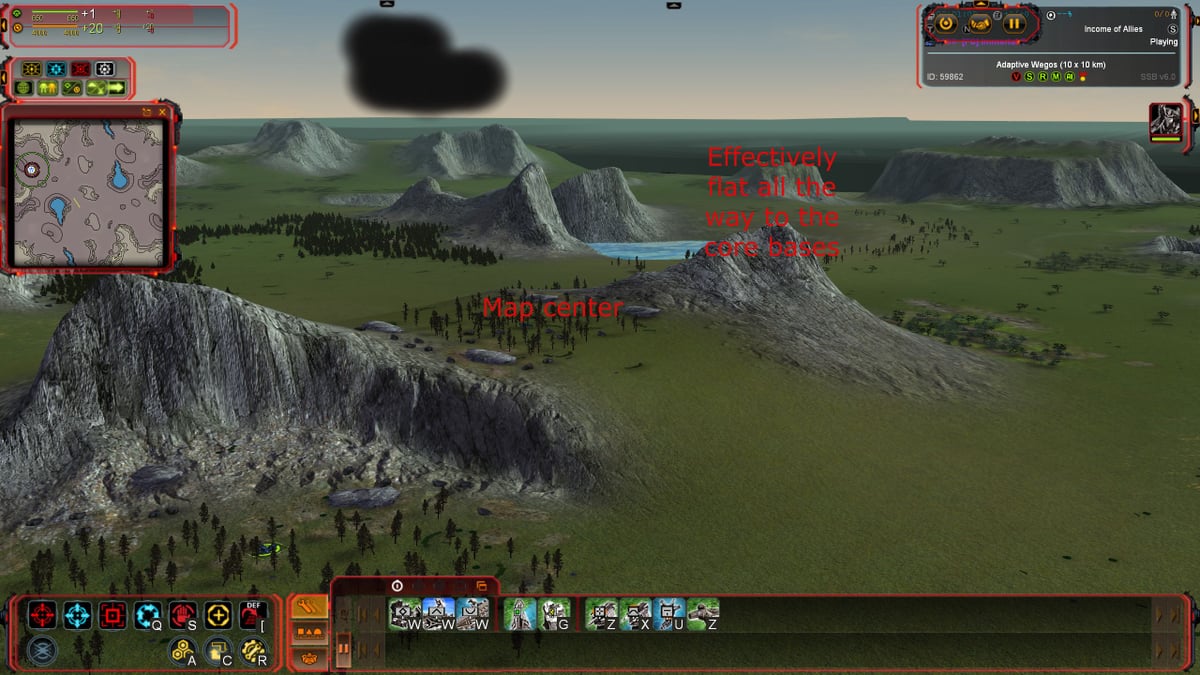
Wegos, otherwise known as 'the map that looks a lot like Millennium'. There is nothing fancy going on here, but knowing the layout beforehand will always give you an edge. Reclaim is spread out exactly as one would expect, across all the terrain features. Wegos plays similarly to Open Wonder, with the extra steps of a mountain & pond on each side.
Game Plan
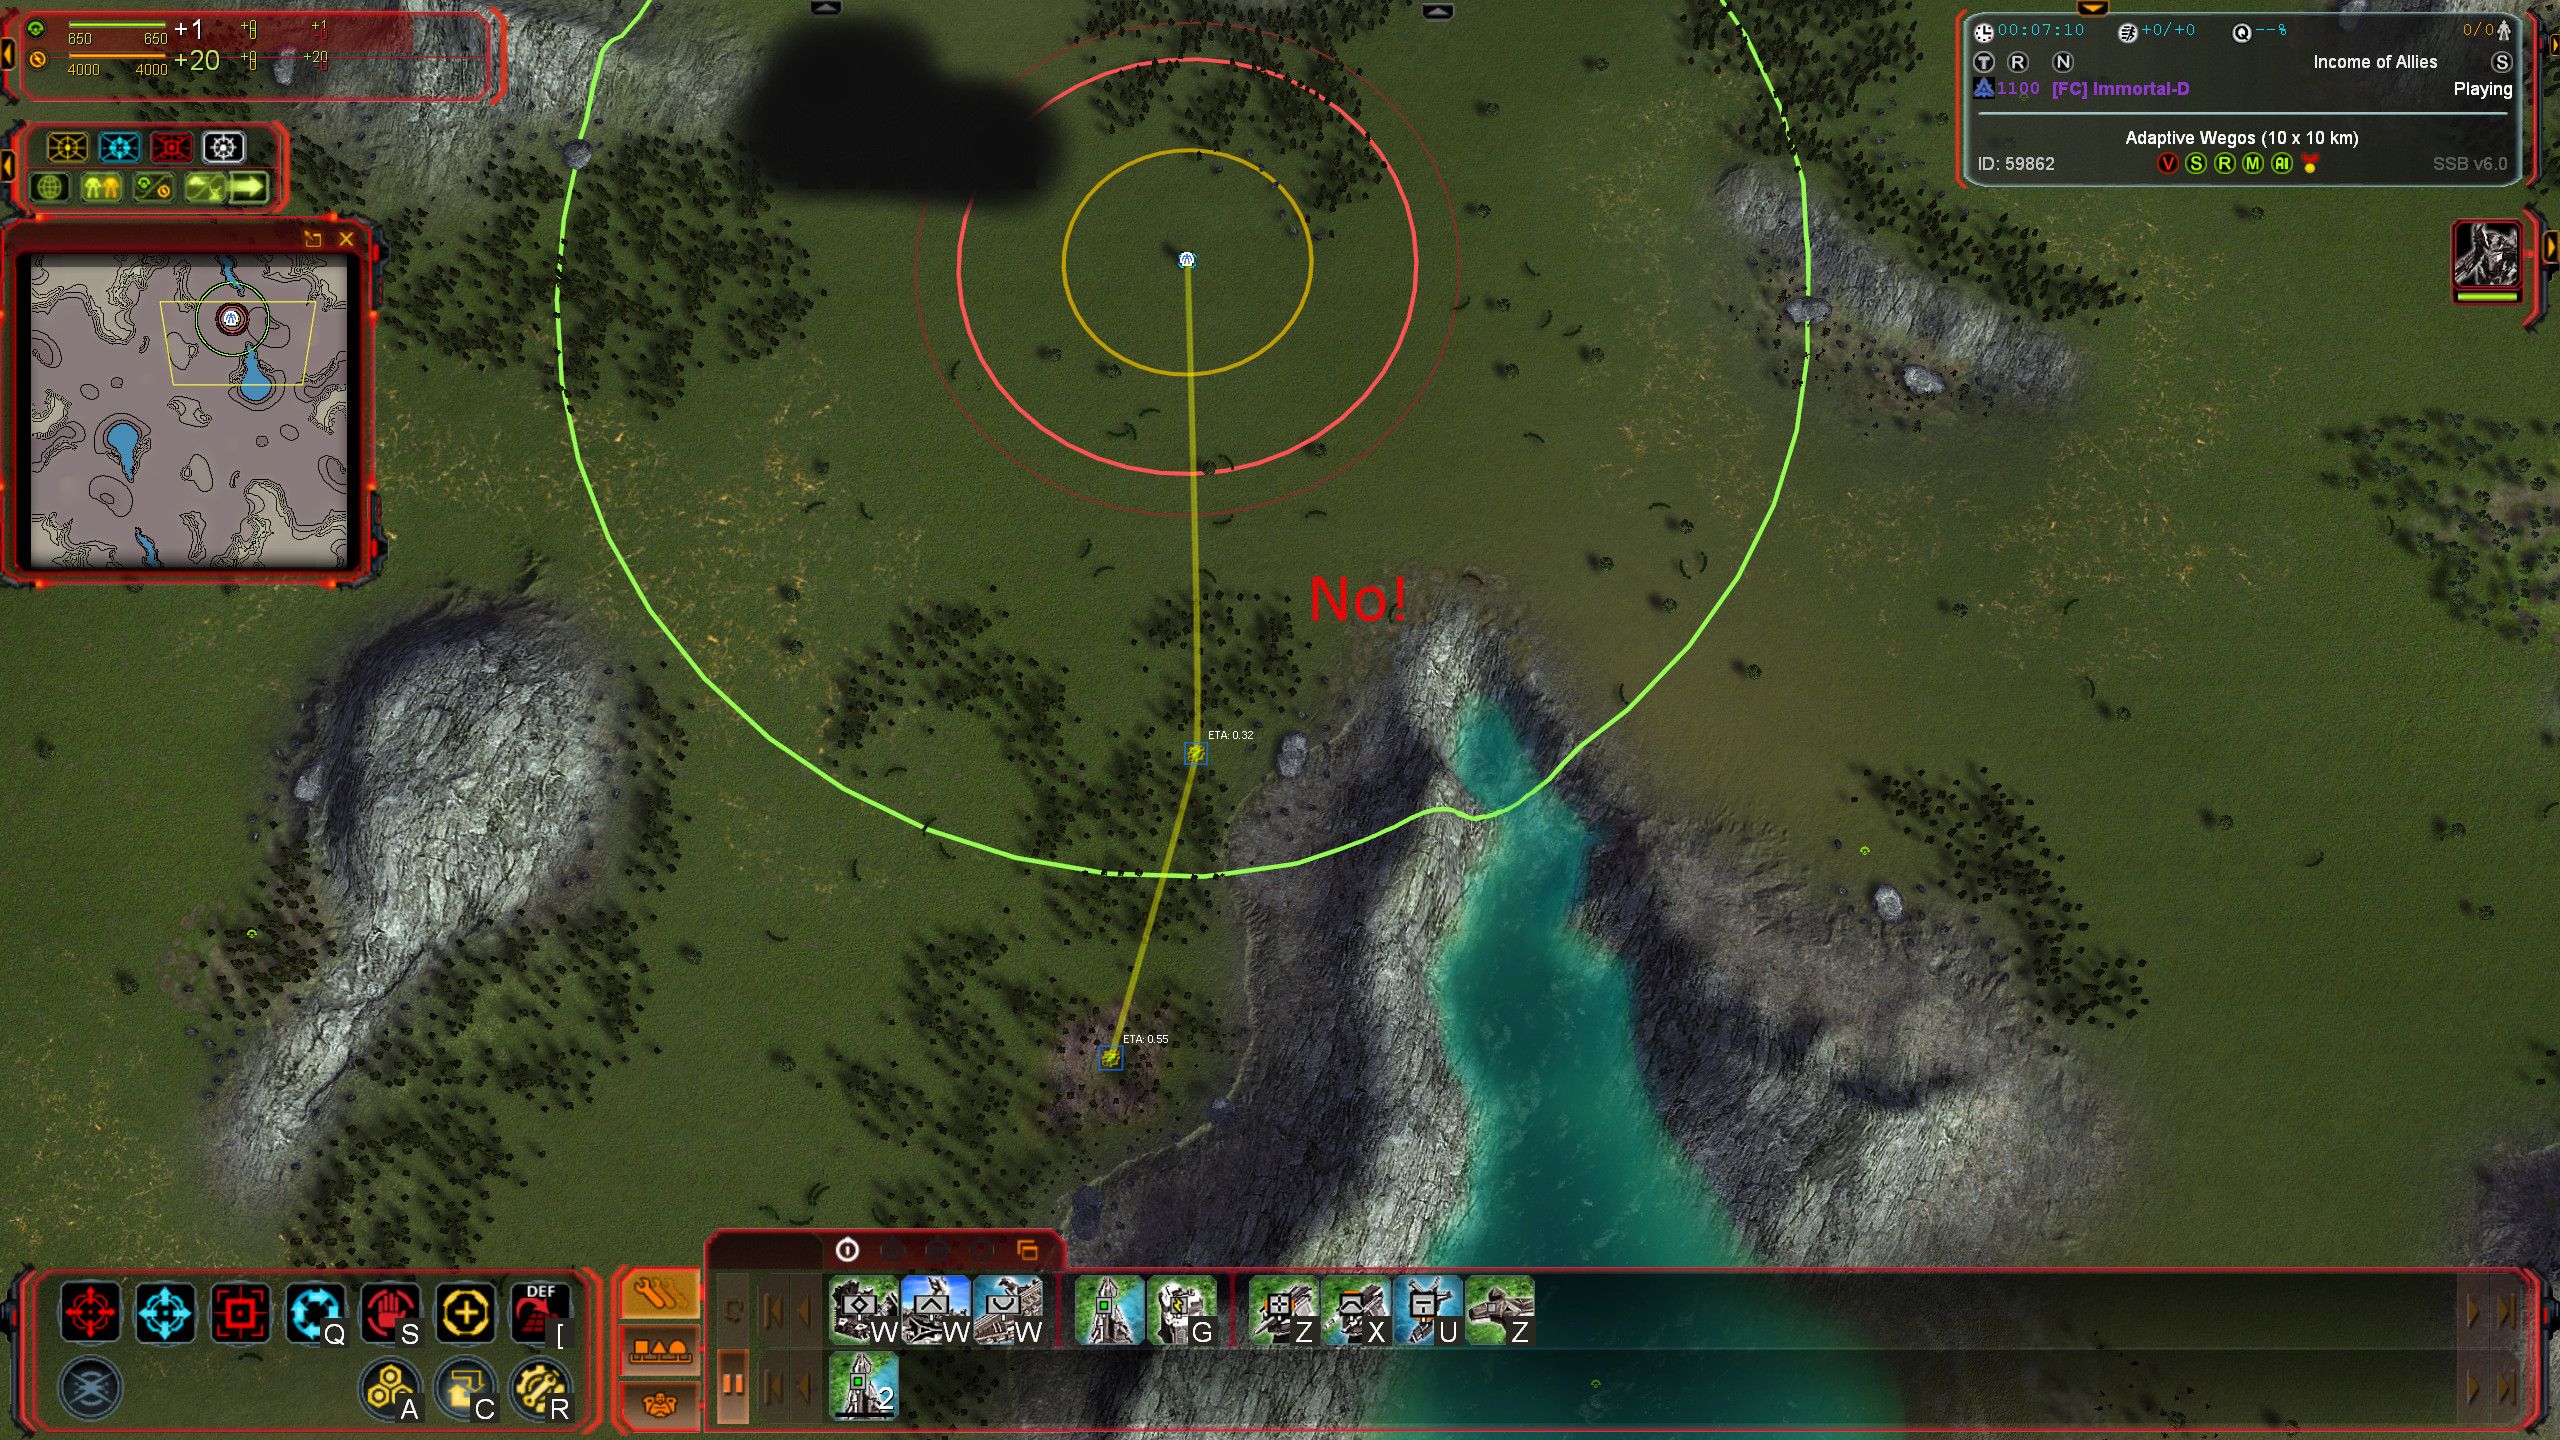
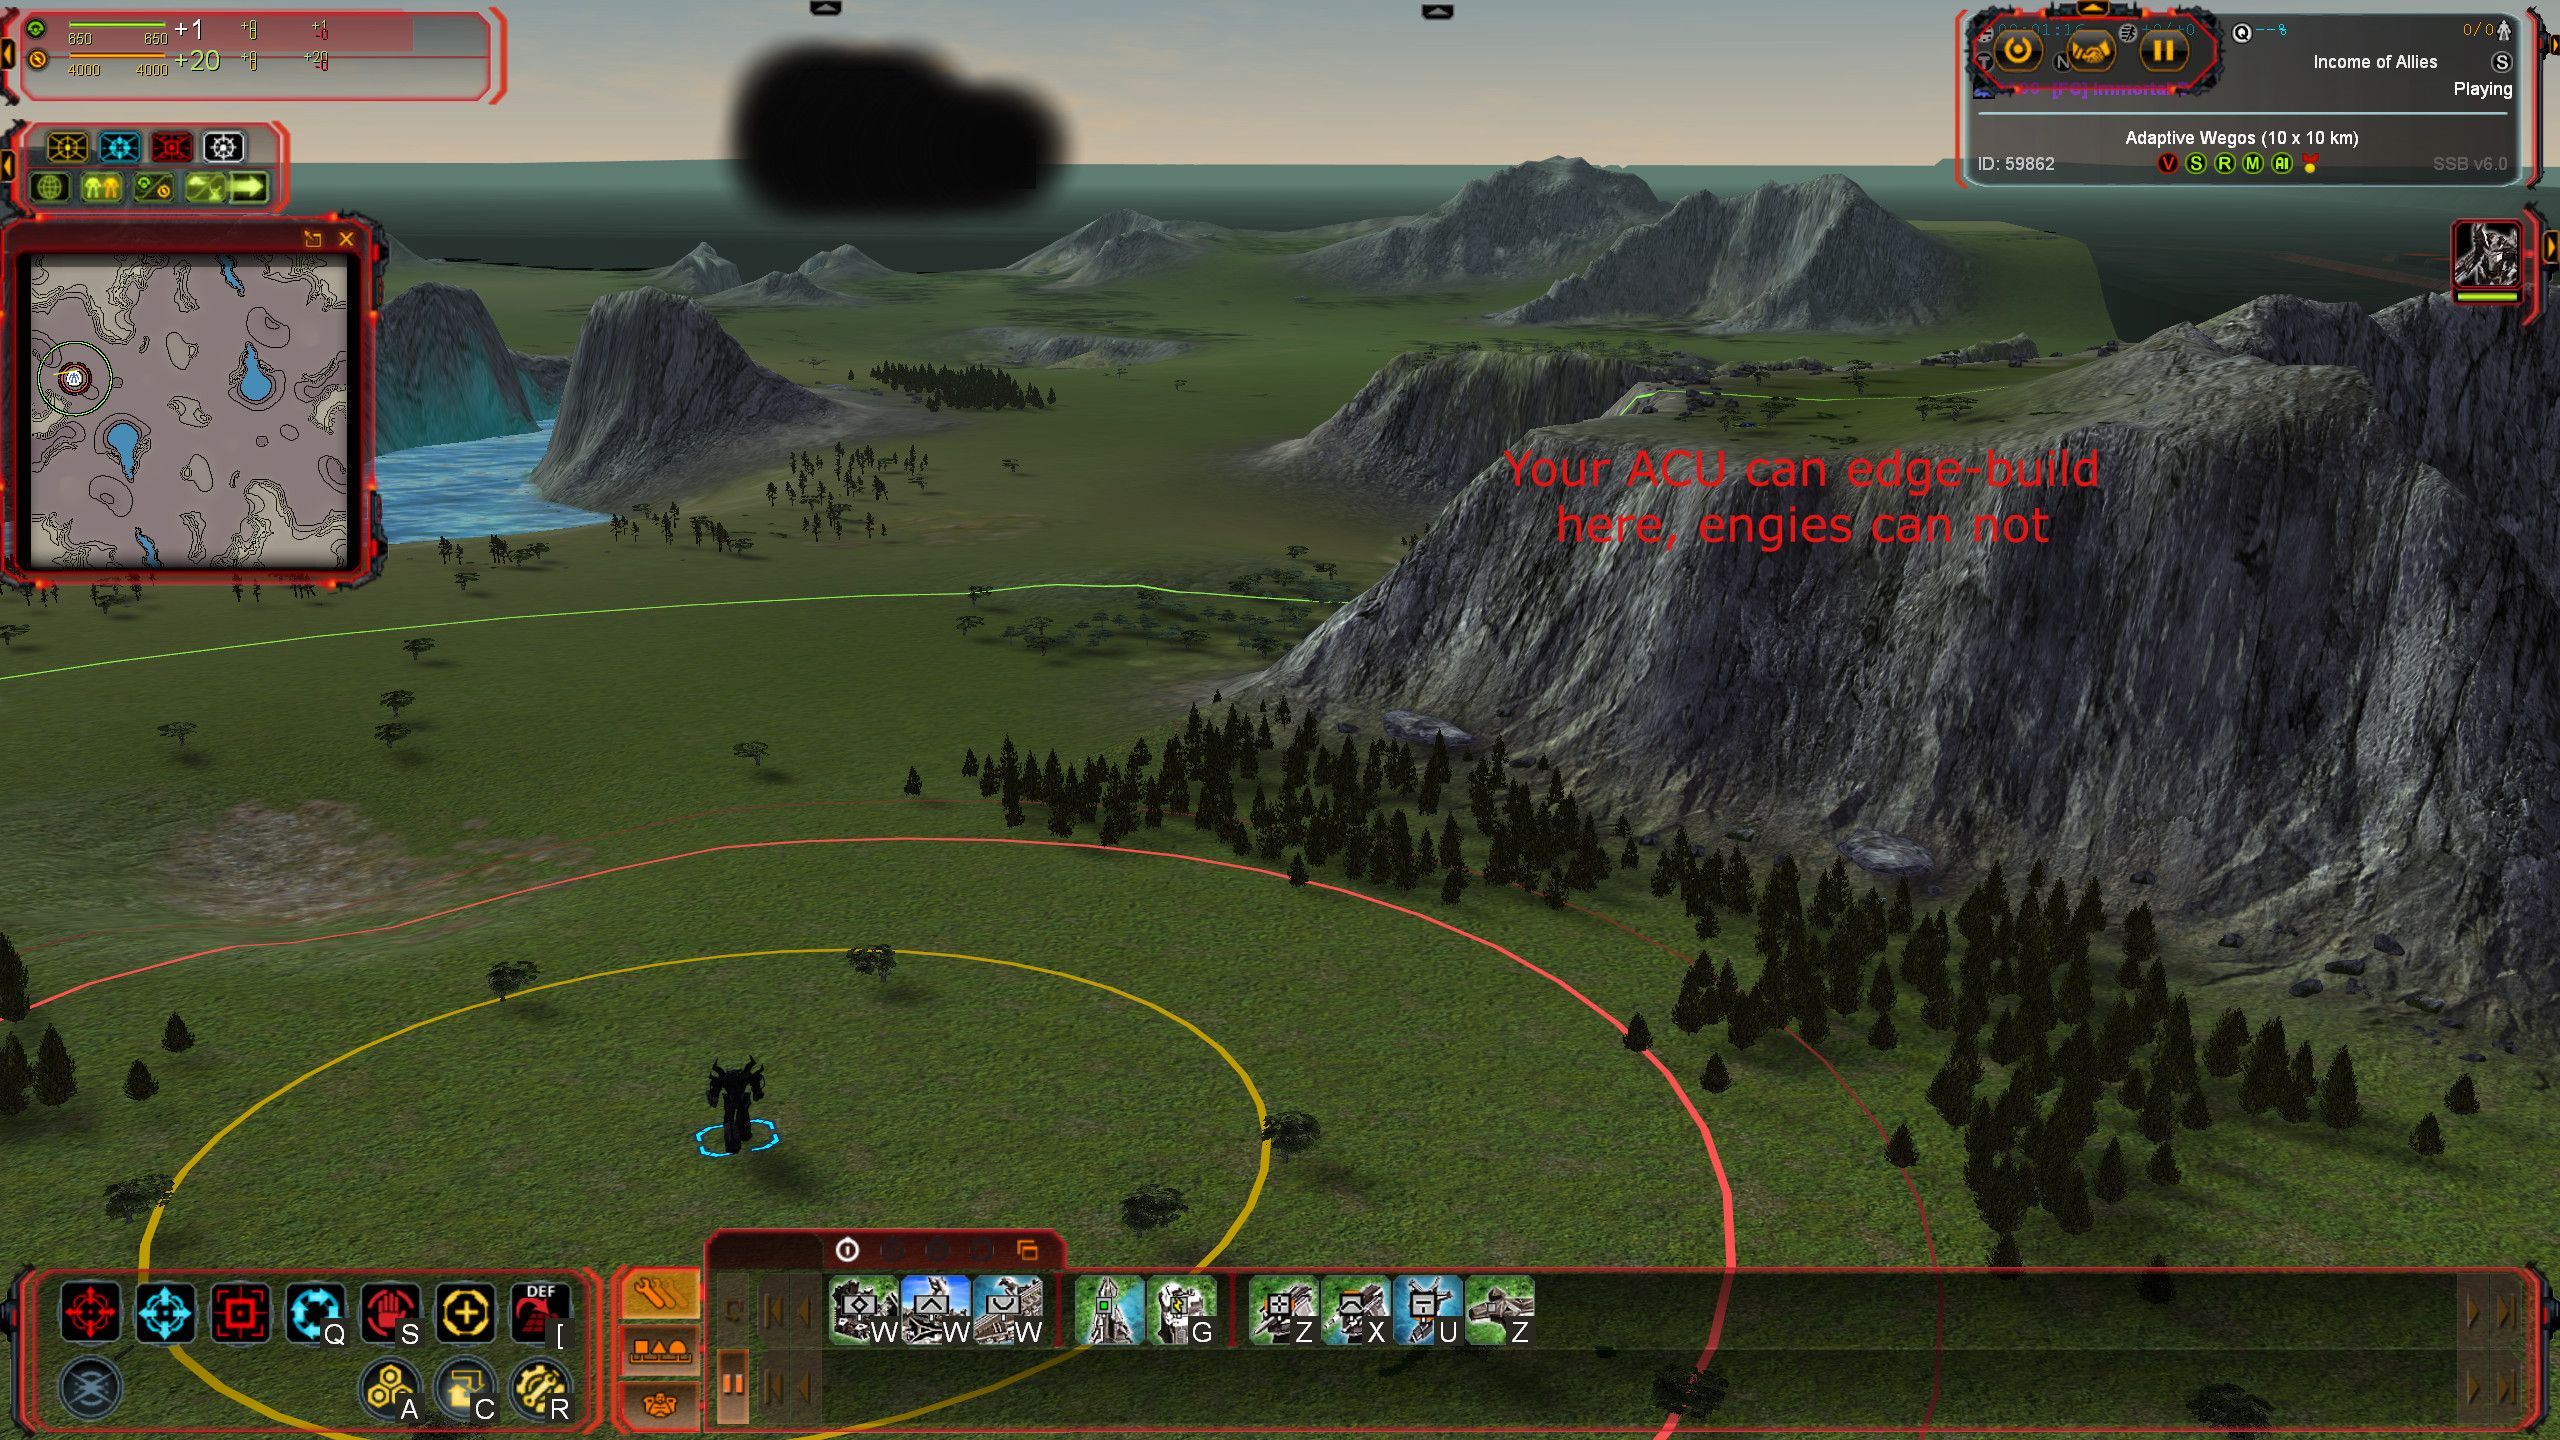
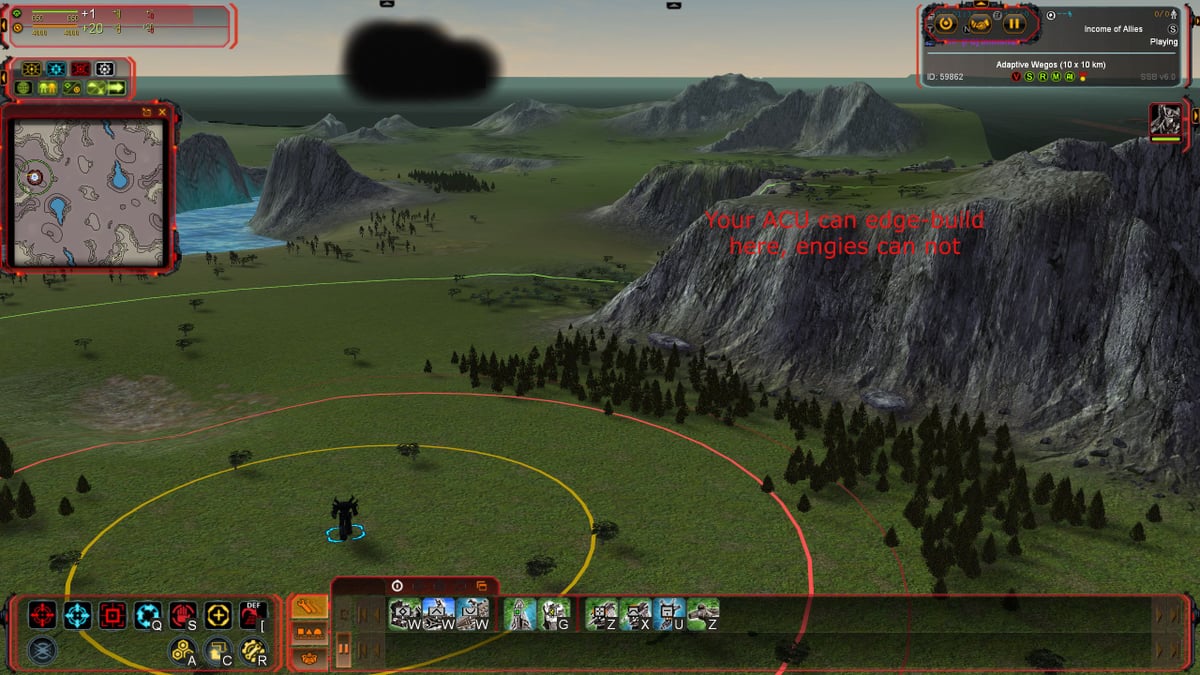
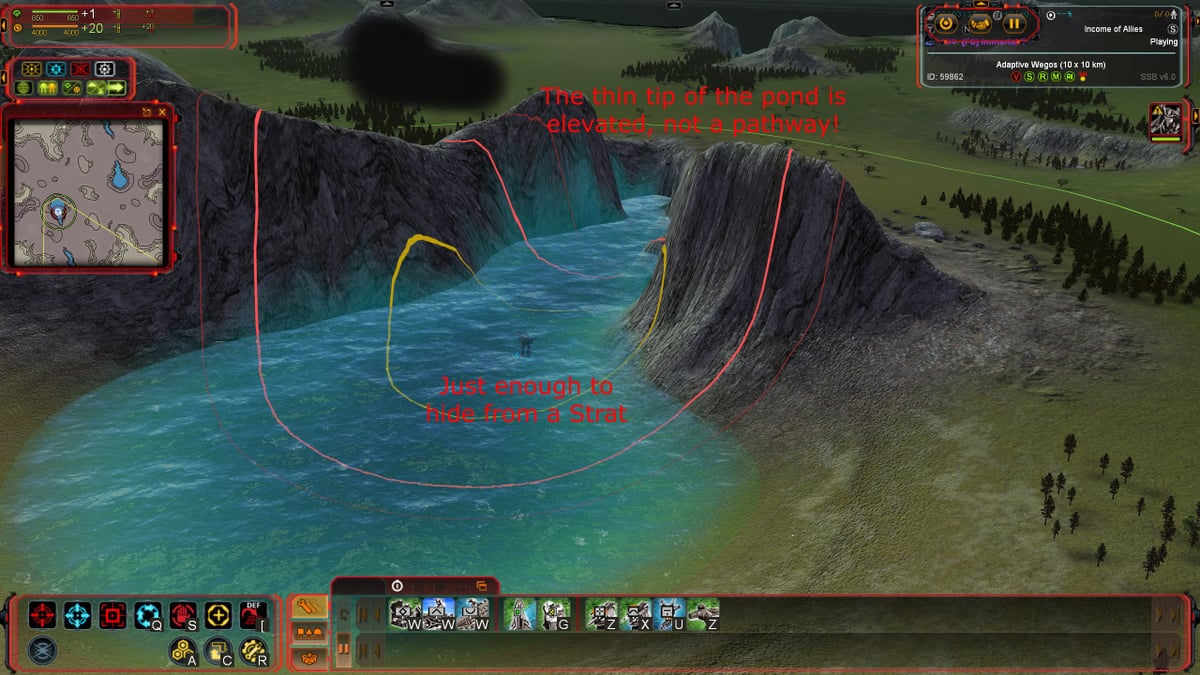
The space between the pond & mountain forms a natural chokepoint that can be difficult to break. Fire-basing should never be your first plan, but a couple of well placed T2 Artillery can hold the line for a time. Focus on securing the mountains and trying to establish a presence on your opponent's side of the water. A T2 ACU can go under water and use its' range to effectively build behind enemy lines, either to the sides or at the tip of the pond.
There is nothing more to say about this map. Most of the fighting will take place in the center as players try to skirt the edges of the pond. Coordinate with your team to break a firebase and push through. Lastly, remember that on maps like this, building Salems earns you secret bonus points towards your score.Speaking of bonuses...
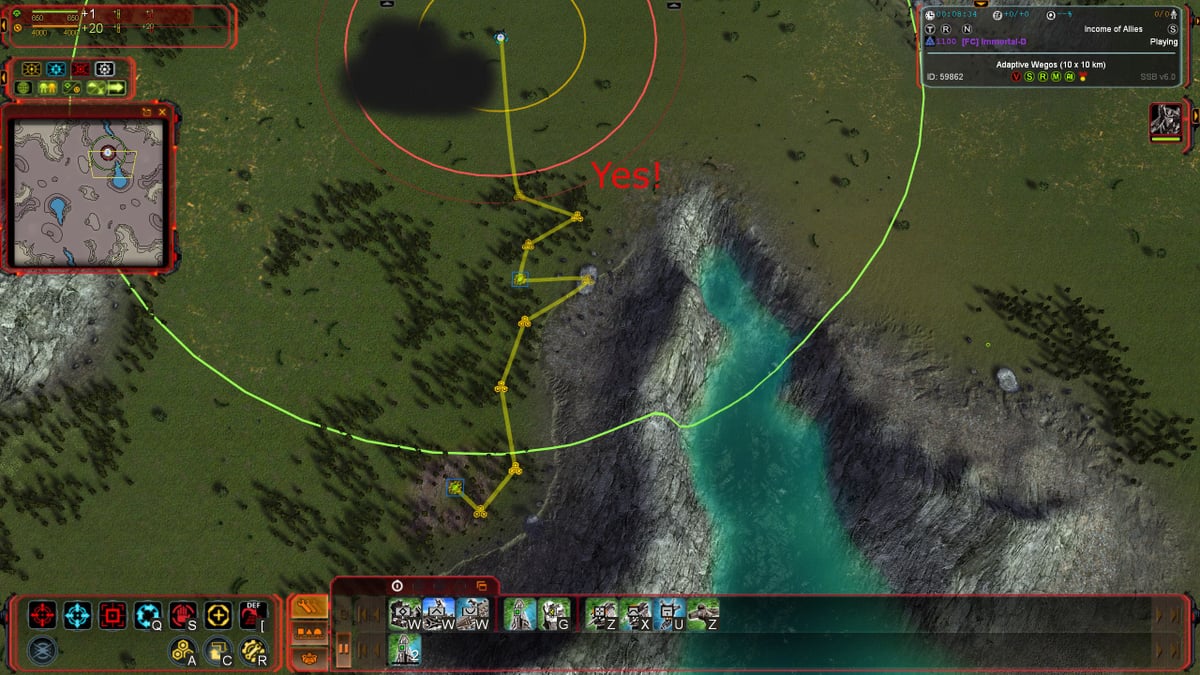
This map is a prime example of a travesty I see all too often. Players walk straight through dense tree-groups that are safely on their side of the map. This can cost you hundreds of mass over the course of the game. Improving at SupCom involves a lot of little things, and taking the extra second to reclaim your way to a location is one of them.

-
I have updated the first guide to show mirrored lanes, and be a little more concise. Barring any specific interest, the second guide will be the last. Suggestions are welcome of course. Otherwise, enjoy!
Hello! It looks like you're interested in this conversation, but you don't have an account yet.
Getting fed up of having to scroll through the same posts each visit? When you register for an account, you'll always come back to exactly where you were before, and choose to be notified of new replies (either via email, or push notification). You'll also be able to save bookmarks and upvote posts to show your appreciation to other community members.
With your input, this post could be even better 💗
Register Login